Installing SSM Agent
Fleet Control is based on AWS Systems Manager that provides access to the Virtual Machines. This requires an AWS Systems Manager Agent to be installed and running. Please note that most of AWS EC2 instances have this agent already installed and require no further actions, except for setting necessary IAM policies.
There are 2 possible ways of installing and configuring SSM Agent:
- IAM mode: Default and recommended mode for EC2 instances.
- Hybrid mode: Used to register non AWS instances (e.g. Azure, Google Cloud).
Please note that AWS EC2 instances can be configured in hybrid mode, but this is highly discouraged. This may cause various issues with other automation based on Systems Manager, because the default AWS account (where instance is running) will lose access to the instance.
Requirements
- Linux or Windows OS. Please check AWS documentation for list of all supported versions. Additionally, we provide custom-built binary to support ppc64le architecture for Linux machines.
- Outbound internet connection. There is no need for any inbound access like SSH or RDP. If there is a firewall in place, please check Firewall configuration.
- Windows: Powershell >= 3.0
- EC2: IAM profile with permissions required by SSM.
Hybrid mode
SSM Agent should be installed in hybrid mode for all non-AWS instances. To simplify this process, Fleet Control delivers ready to use installer binary, that has to be executed on the virtual machine. This binary will automatically fetch required credentials, install SSM Agent, configure it, and register the instance in the Fleet Control.
Machine can be registered in two ways, to different accounts:
-
Dedicated account created by Fleet Control - registration is done by installer in one of the enabled regions (depending on the activation capacity). Regions that are enabled for hybrid registration are set during customer tenant creation.
Follow to the next section to find instructions how to do this: Registering machine using Fleet Control dedicated account.
-
AWS cloud account added by customer - registration has to be done by customer and it's verified by installer.
It is described in the section Registering machine using customer AWS account.
Registering machine using Fleet Control dedicated account
Please follow the instructions below to install machine at one of the dedicated account and region.
Please refer to our GraphQL API guide on how to execute below commands.
-
Create Fleet Control API key for automation. This key will be used by installer to authorize API requests:
Create API key
mutation createApiKey {createApiKey(input: {name: "SSMInstallerApiKey"owner: "<PUT_OWNER_EMAIL_HERE>"expiresAt: "2024-01-01T00:00:00"}) {apiKey {id}apiKeySecret}} -
Create API role that allows
ACTIVATIONandRESOURCEmanagement to API key created in the first step:Create API key role
mutation createApiKeyRole {createRole(input: {name: "SSMInstallerRole"rules: [{ resources: [ACTIVATION, RESOURCE], actions: ANY }]}) {id}} -
Create permission by binding previously created API key and API role:
Create role binding
mutation assignApiKeyRole {createRoleBinding(input: {type: API_KEYroleId: "<PUT_ROLE_ID_HERE>"subject: "<PUT_API_KEY_ID_HERE>"}) {id}} -
Log in to the instance.
-
Create configuration file named
installer.confwith the following content. Please use API key created in the first step and your customer ID. You can find the guide on how to get your customer ID in the How to get customer ID section.customer_id: "<PUT_YOUR_FLEET_CONTROL_CUSTOMER_ID_HERE>"api_key: "<PUT_FLEET_CONTROL_API_KEY_SECRET_HERE>"api_url: "https://api.fleetcontrol.nordcloudapp.com/graphql" -
Download installer binary:
- Windows
- Linux
- Linux (ppc64le)
Using PowerShell:
Invoke-WebRequest -URI https://fleet-control-prod-host-installer-cli.s3.eu-west-1.amazonaws.com/host-installer-cli-windows.exe -OutFile installer.exeDownload with one of the available binaries, for example
curl:curl -Lo installer https://fleet-control-prod-host-installer-cli.s3.eu-west-1.amazonaws.com/host-installer-cli-linuxAWS does not officially support ppc64le architecture, but we provide custom-built binary for it. Download with one of the available binaries, for example
curl:curl -Lo installer https://fleet-control-prod-host-installer-cli.s3.eu-west-1.amazonaws.com/host-installer-cli-linux-ppc64le -
Execute the binary.
- Windows
- Linux
Make sure to run as Administrator:
.\installer.exe installMake sure to make the file executable and to run as root or with
sudo:chmod +x installersudo ./installer install
Installation scripts
Installation script LINUX
# Create configuration file
cat <<EOT >> installer.conf
customer_id: "<PUT_YOUR_FLEET_CONTROL_CUSTOMER_ID_HERE>"
api_key: "<PUT_FLEET_CONTROL_API_KEY_SECRET_HERE>"
api_url: "https://api.fleetcontrol.nordcloudapp.com/graphql"
EOT
# Download binary
curl -Lo installer https://fleet-control-prod-host-installer-cli.s3.eu-west-1.amazonaws.com/host-installer-cli-linux
chmod +x installer
# Execute installer
sudo ./installer install
Installation script LINUX (ppc64le)
# Create configuration file
cat <<EOT >> installer.conf
customer_id: "<PUT_YOUR_FLEET_CONTROL_CUSTOMER_ID_HERE>"
api_key: "<PUT_FLEET_CONTROL_API_KEY_SECRET_HERE>"
api_url: "https://api.fleetcontrol.nordcloudapp.com/graphql"
EOT
# Download binary
curl -Lo installer https://fleet-control-prod-host-installer-cli.s3.eu-west-1.amazonaws.com/host-installer-cli-linux-ppc64le
chmod +x installer
# Execute installer
sudo ./installer install
Installation script WINDOWS
# Create configuration file
$configContent = @"
customer_id: "<PUT_YOUR_FLEET_CONTROL_CUSTOMER_ID_HERE>"
api_key: "<PUT_FLEET_CONTROL_API_KEY_SECRET_HERE>"
api_url: "https://api.fleetcontrol.nordcloudapp.com/graphql"
"@
New-Item -Path . -Name "installer.conf" -ItemType "file" -Value $configContent
# Download binary
Invoke-WebRequest -URI https://fleet-control-prod-host-installer-cli.s3.eu-west-1.amazonaws.com/host-installer-cli-windows.exe -OutFile installer.exe
# Execute installer
./installer.exe install
Registering machine using customer AWS account
This method assumes that VM is already registered to one of the SSM activation at customer's AWS account. Please check AWS documentation to learn how to create an activation and register a machine.
The AWS cloud account needs to be added to Fleet Control. Please follow the AWS onboarding guide.
Installation process is very similar to the one presented above in Registering machine using Fleet Control dedicated account with small differences:
-
The API key role created needs to have additional permissions for
CLOUD_ACCOUNTresource.Since we want to use a customer's cloud account, the API key needs to have at least
VIEWpermission to it. During installation, the cloud account specified by user is checked to confirm the machine registration.Please use modified version of mutation that creates API key role. In the example below all actions are allowed for resources:
ACTIVATION,RESOURCE,CLOUD_ACCOUNT:Create API key role
mutation createApiKeyRole {createRole(input: {name: "SSMInstallerRole"rules: [{ resources: [ACTIVATION, RESOURCE, CLOUD_ACCOUNT], actions: ANY }]}) {id}} -
The installer needs to be executed with additional
--customer-aws-account-idflag that specifies the AWS account id where machine is registered.During installation the provided account id will be used to check the registration of the machine. When successfully found, the access details will be updated for the Fleet Control resource.
- Windows
- Linux
Make sure to run as Administrator:
.\installer.exe install --customer-aws-account-id <PUT_CUSTOMER_AWS_ACCOUNT_ID_HERE>Make sure to make the file executable and to run as root or with
sudo:chmod +x installersudo ./installer install --customer-aws-account-id <PUT_CUSTOMER_AWS_ACCOUNT_ID_HERE>
Registering machine in specific region
In case of re-registering already registered machine, you need to remove it from the Fleet Control first.
To register machine in specific region, you need to provide --ssm-registration-region flag with AWS region name
(the region must be enabled for the customer).
This flag is optional and if not provided, the first available region will be used.
- Windows
- Linux
Make sure to run as Administrator:
.\installer.exe install --ssm-registration-region <AWS_REGION>
Make sure to make the file executable and to run as root or with sudo:
chmod +x installer
sudo ./installer install --ssm-registration-region <AWS_REGION>
Configuring IAM roles
Hybrid Activation IAM role
In order for the SSM Agent to be able to store logs in Fleet Control buckets,
please attach policy NordcloudFleetControlEC2PatchingPolicy to IAM role configured for your SSM Hybrid Activation.
By default, hybrid activations use AmazonEC2RunCommandRoleForManagedInstances role.
Fleet Control Service role
Make sure NordcloudFleetControlServiceRole has the following permission:
- Effect: Allow
  Action:
    - ssm:SendCommand
  Resource:
    - "arn:aws:ssm:*:*:managed-instance/*"
NordcloudFleetControlEC2PatchingPolicy managed policy is created by the AWS CloudFormation template during
AWS account onboarding process.
IAM mode
Running SSM Agent in IAM mode is recommended for all EC2 instances. In this model EC2 instances stay registered in customer AWS account and Fleet Control assumes IAM role to access them. By default, SSM Agent is pre-installed on the following images:
- Windows Server
- Amazon Linux
- Amazon Linux 2
- Ubuntu Server
To install SSM Agent on any other operating system, please refer to AWS documentation.
To configure Fleet Control access to EC2 instance, please follow the steps below:
-
Onboard AWS account to Fleet Control. Please follow the AWS onboarding guide.
-
Create IAM Instance profile Role with
AmazonSSMManagedInstanceCoreandNordcloudFleetControlEC2PatchingPolicymanaged policy.
-
Assign IAM role to all EC2 instances that will be managed by Fleet Control.
-
Verify EC2 instances are visible and running in the AWS Systems Manager. This can be found in
Fleet Managersection.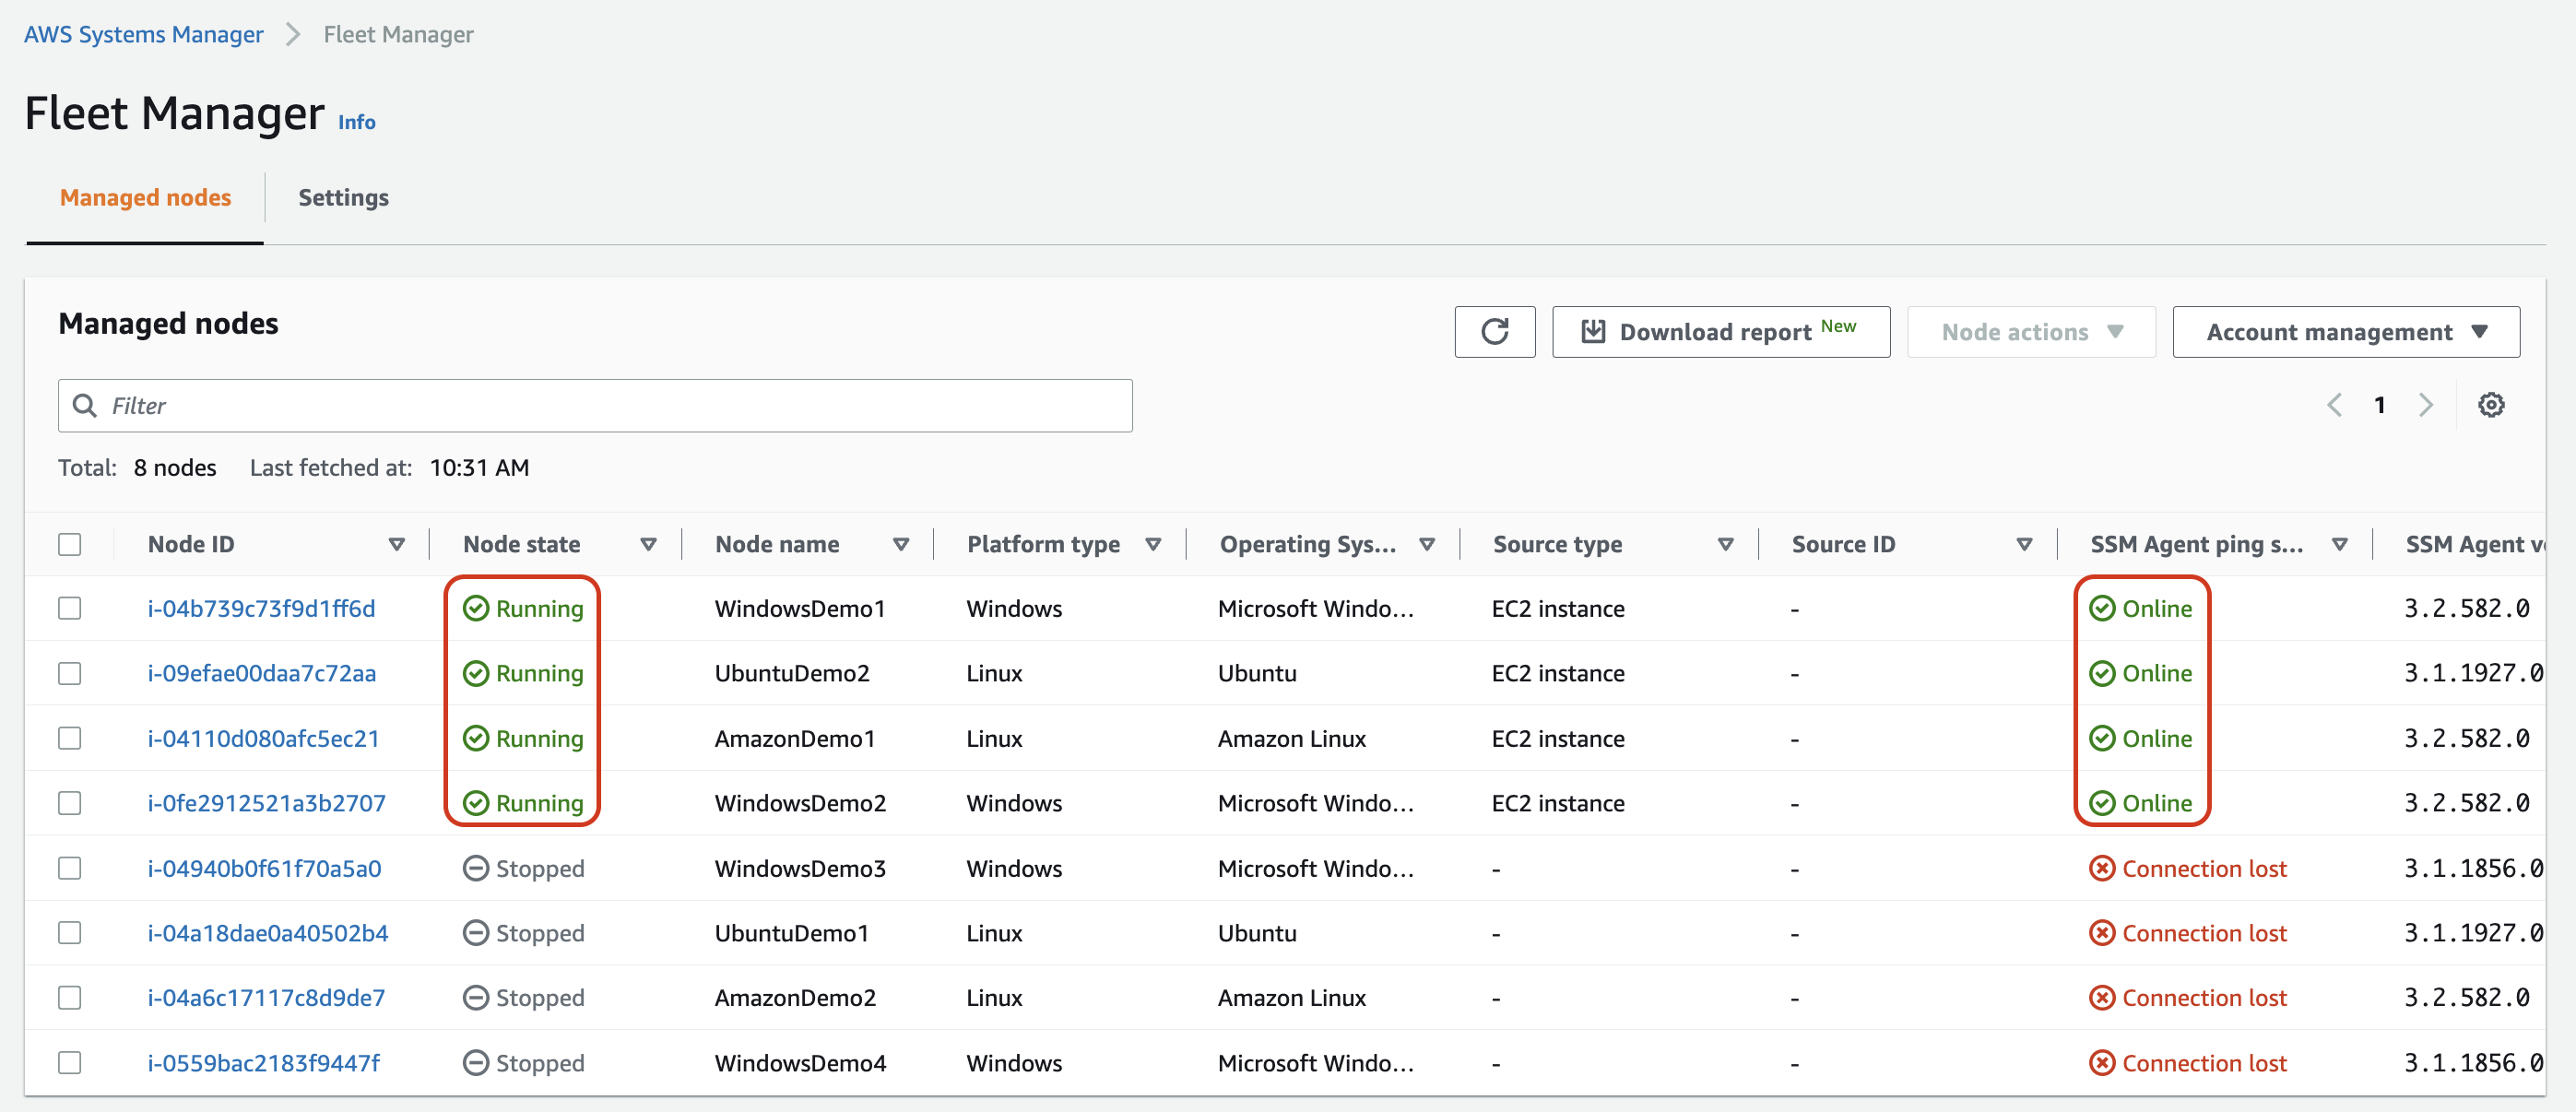
NordcloudFleetControlEC2PatchingPolicy managed policy is created by the AWS CloudFormation template during AWS account
onboarding process. This policy is required by SSM Agent to transfer logs to Fleet Control S3 bucket. Omitting this policy
results in missing logs and outputs from commands executed on EC2 instances.
AmazonSSMManagedInstanceCore is a base policy allowing SSM Agent to communicate with Systems Manager API.
Omitting this policy results in "Lost Connection" status and inability to access the instance.