Cloud Accounts
To get to the cloud accounts page, go to the left menu and click Cloud Accounts.

To add resources to Fleet Control, it is recommended that you onboard a cloud account and use the auto-discovery feature. At present, this feature is available for AWS, Azure, and Google Cloud and enables you to discover all virtual machines along with their tags and metadata.
By onboarding a cloud account, you can benefit from features such as:
- Instance Discovery: There is no need to add your Virtual Machines manually as they will be automatically detected
- Tag-based Selection: You can use tags to dynamically select resources to include in the operation plan
- Start/Stop Action: You can use the built-in functionality to start or stop instances
1. Cloud Providers
AWS
To discover all of your EC2 instances, you need to onboard each AWS account by creating an IAM role and adding access configuration. To simplify this process, we have a CloudFormation template that is ready to use and will create all necessary parts and policies.
Azure
To discover all your Azure Virtual Machines, you must onboard each subscription by creating a Service Principal and adding access configuration. You can utilize the onboarding bash script mentioned in the section below.
Google Cloud
To discover all your Google Cloud instances, you need to onboard each project by creating a Service Account and adding access configuration. Please follow the steps outlined in the section below.
After onboarding Azure and Google Cloud accounts, you must install an SSM Agent on every instance you want to use in Fleet Control. Instances with no SSM Agent will be discovered, but you won't be able to execute any operation on them.
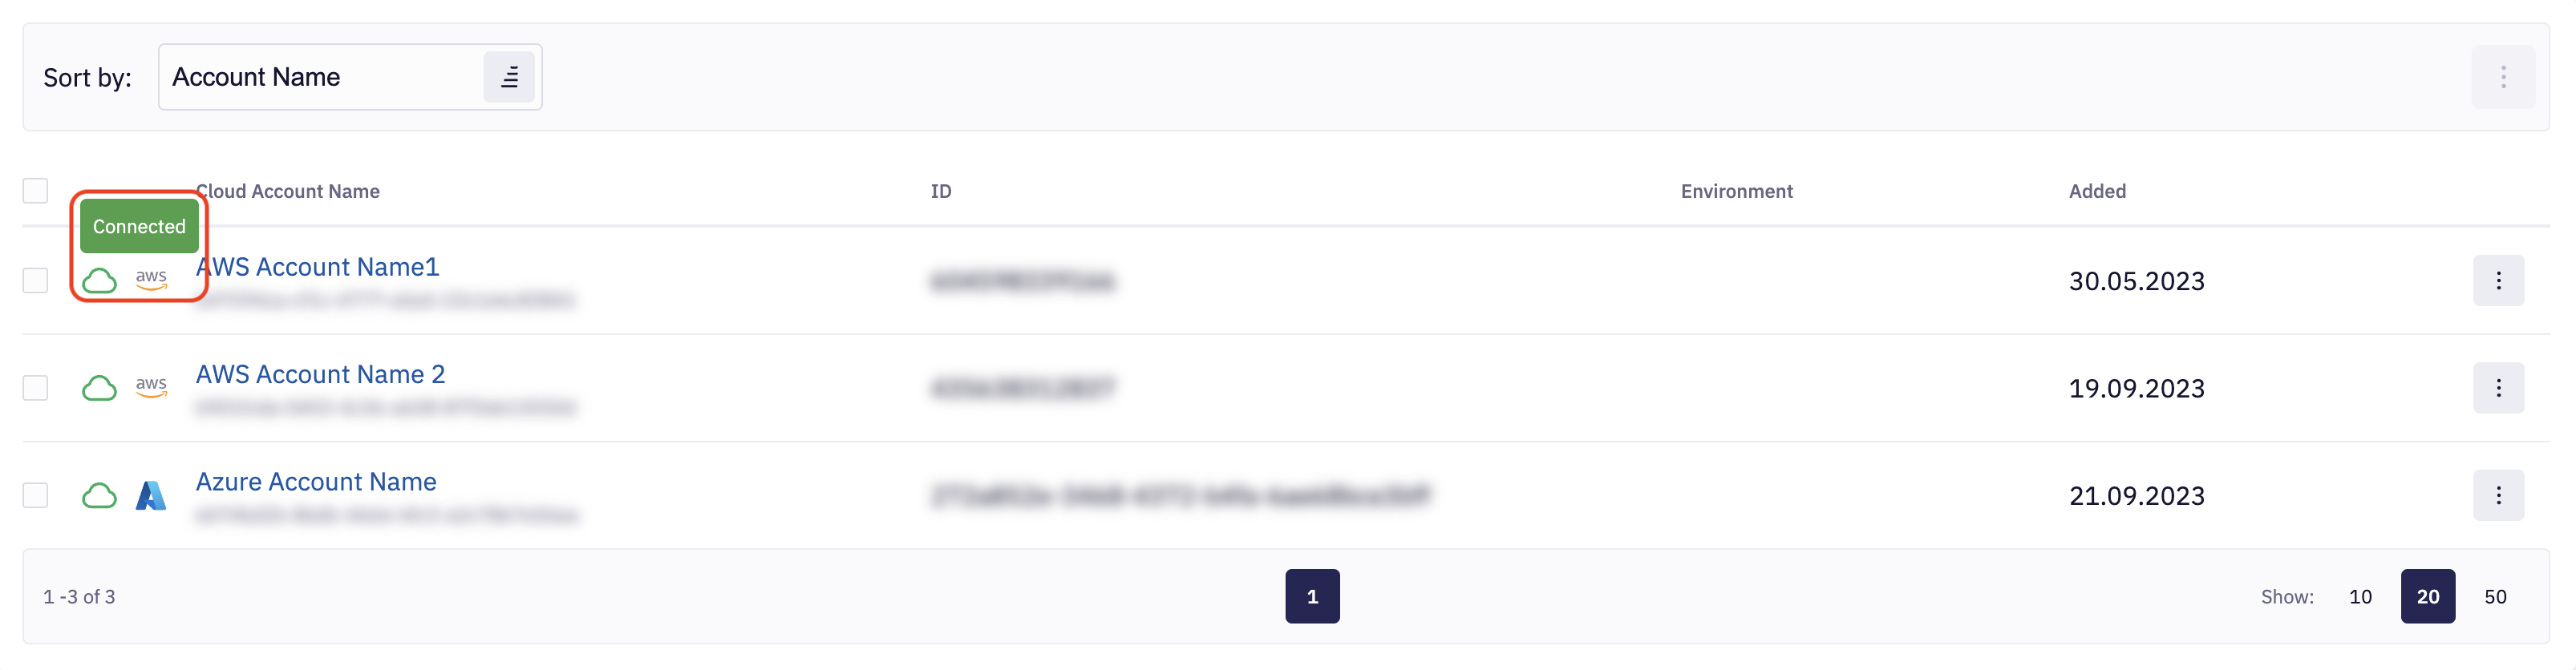
2. List of Accounts
By default, Cloud Accounts are sorted by Account Name, but you can also sort them by Date Added, Date Updated, Status, and Cloud Provider.

Additionally, you can Delete cloud accounts from this section.
3. Account Status
Next to each cloud account name, you will see an icon that shows one of three connection statuses:
- Connected: This means your cloud account is connected, and everything is working as expected
- Access Missing: This means that credentials to access the account are missing
- Access Error: This status means that either the login credentials are invalid, expired or all regions specified by you are not accessible
- Regions Unavailable: This status means that some of the regions you specified are not accessible
- In progress: This status means that scanning process is in progress
In case of issues, please visit the Troubleshooting section.
- To learn more about Cloud Accounts, you can visit the Cloud Account Details page.
- Click to add an AWS, Azure, or Google Cloud Account.
- If you get an errors, please visit Troubleshooting section.
4. Filter accounts
You can filter cloud accounts by pressing Filters button.

Three types of filters are available:
- Creation Date - You can define a specific time range to view cloud accounts created within that period. This makes it easy to target cloud accounts based on when they were added, giving you precise control over your search.
- Cloud Provider - Find cloud accounts based on their provider. See the Cloud Providers for more details.
- Account Status - Cloud Accounts can be filtered based on their status. See the Account Status for more details.
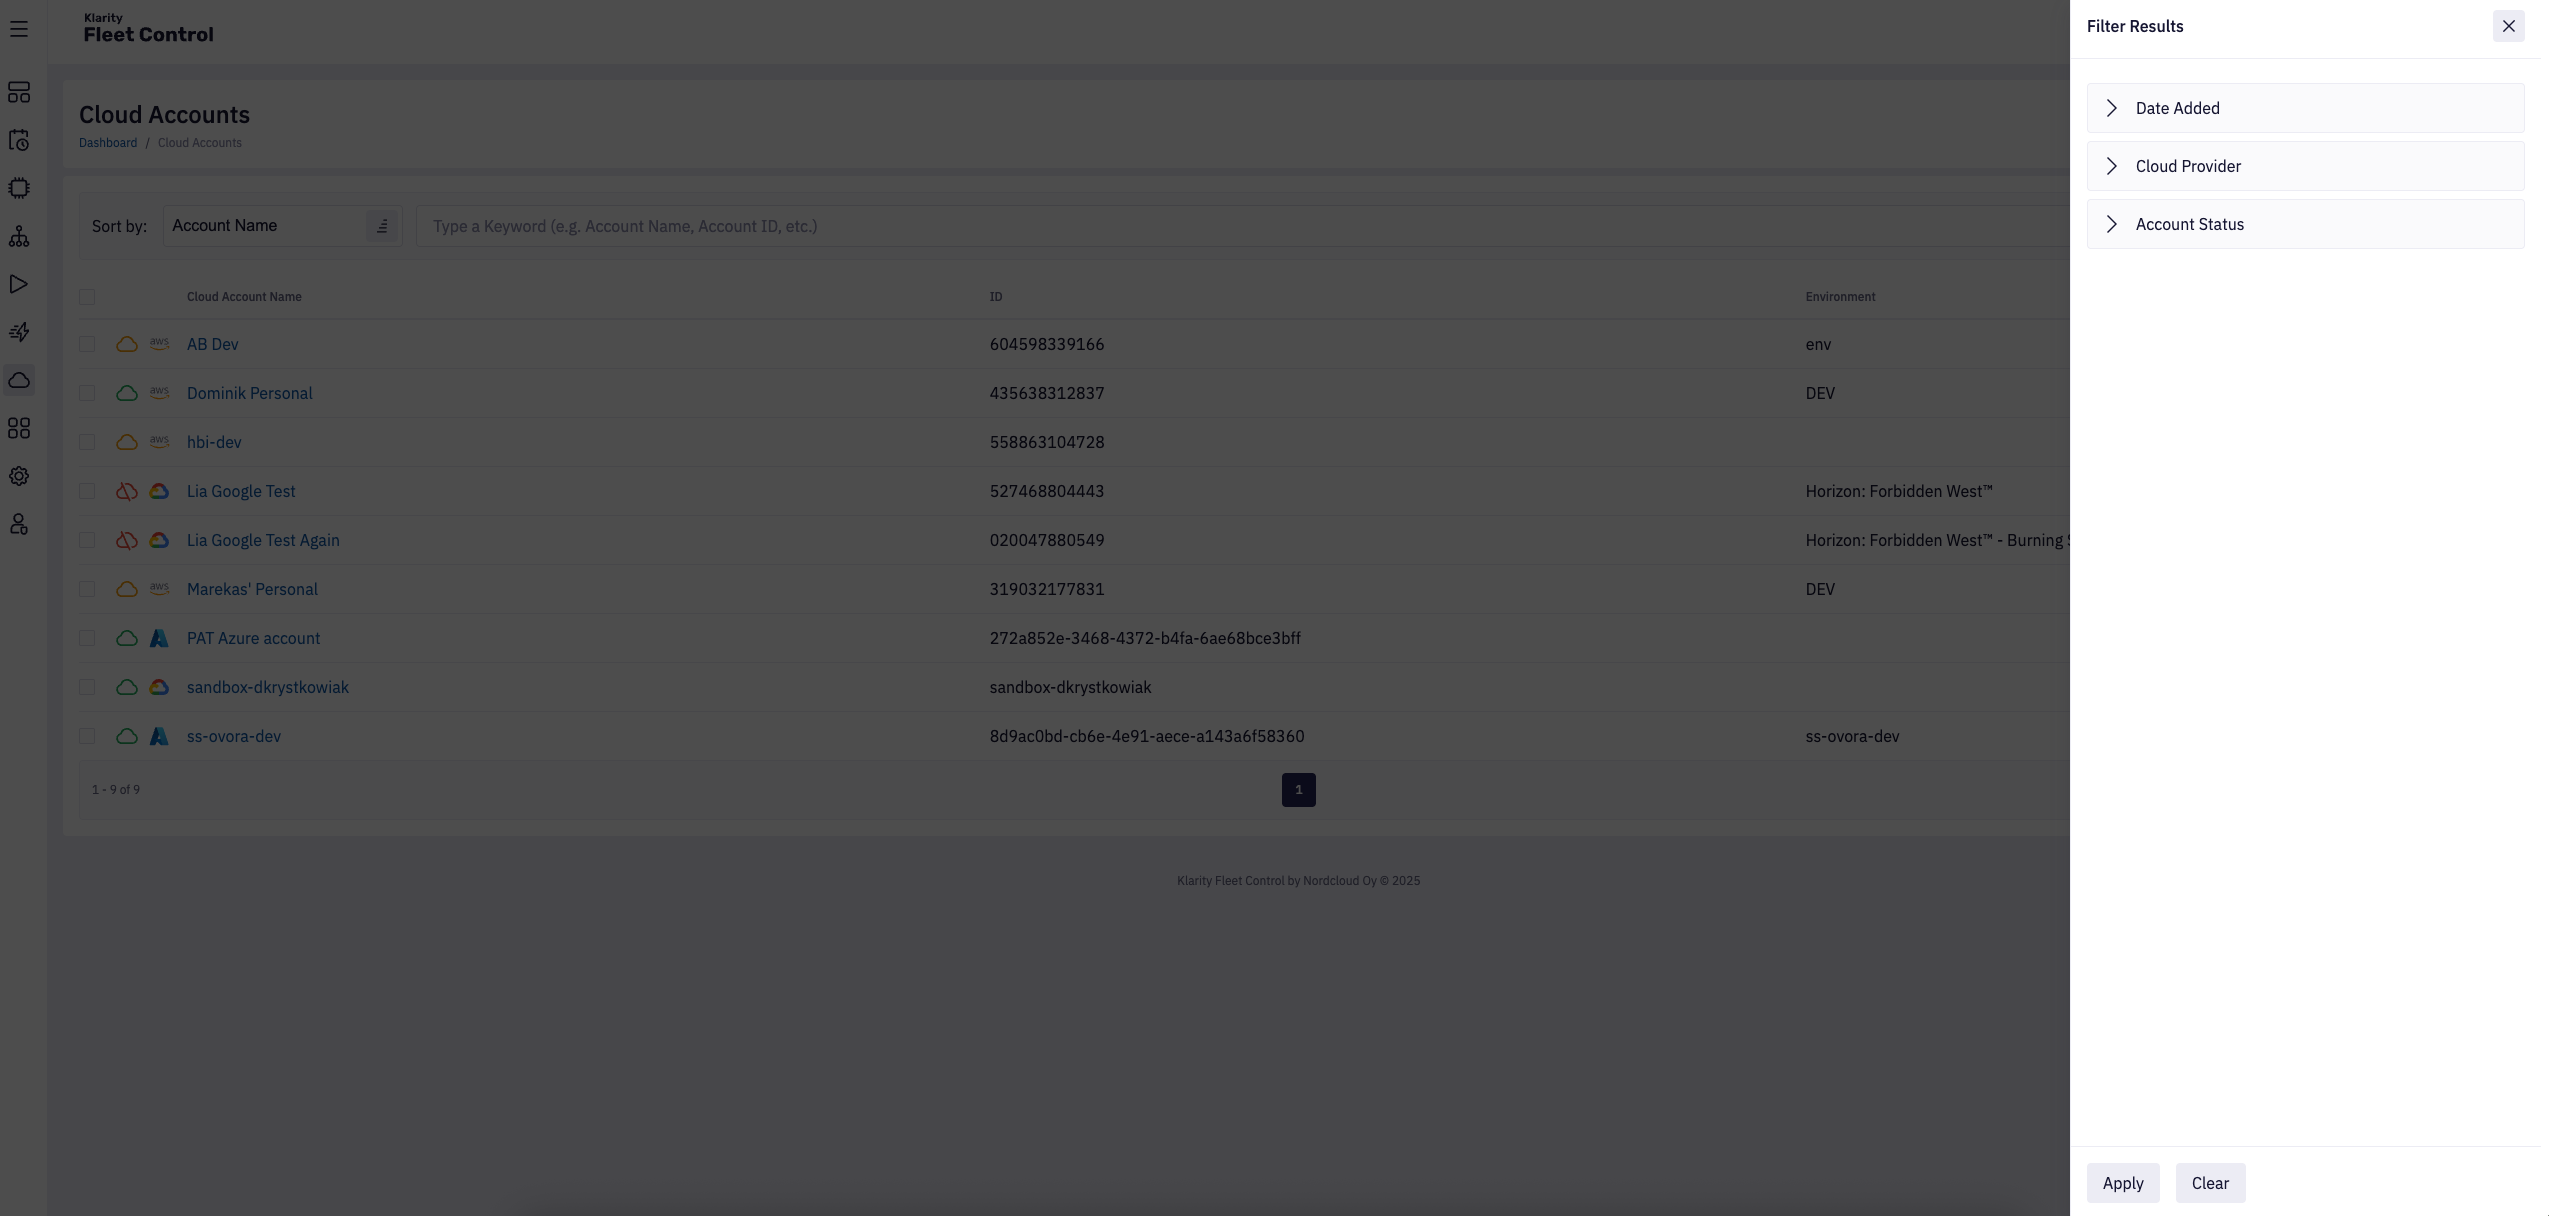
5. Search accounts
In addition to filters functionality, you can use search bar to search for cloud accounts by:
- Keyword, cloud account name, part of the name.
- Cloud Account ID.
- Metadata.

You can combine both search and filters functionality to get fine-grained results.