Create Plan
1. Navigate to Plan List
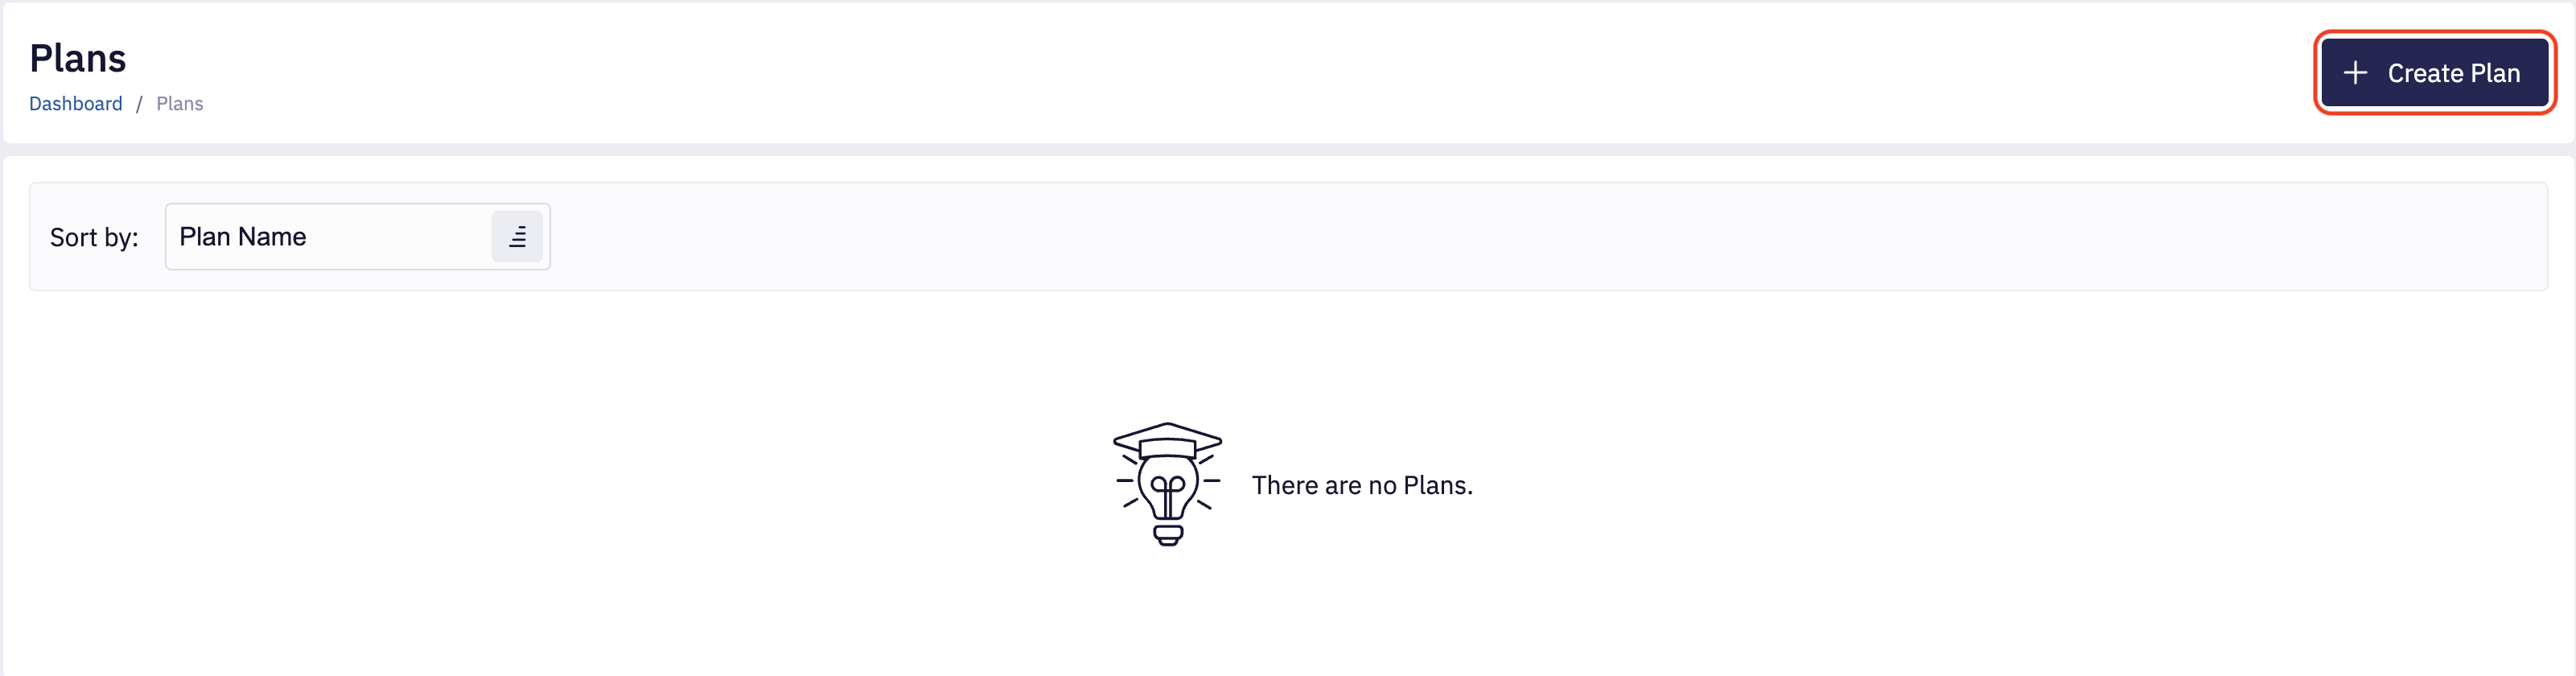
To create a new Plan, click on Plans on the left menu.
Click Create Plan in the top-right corner.
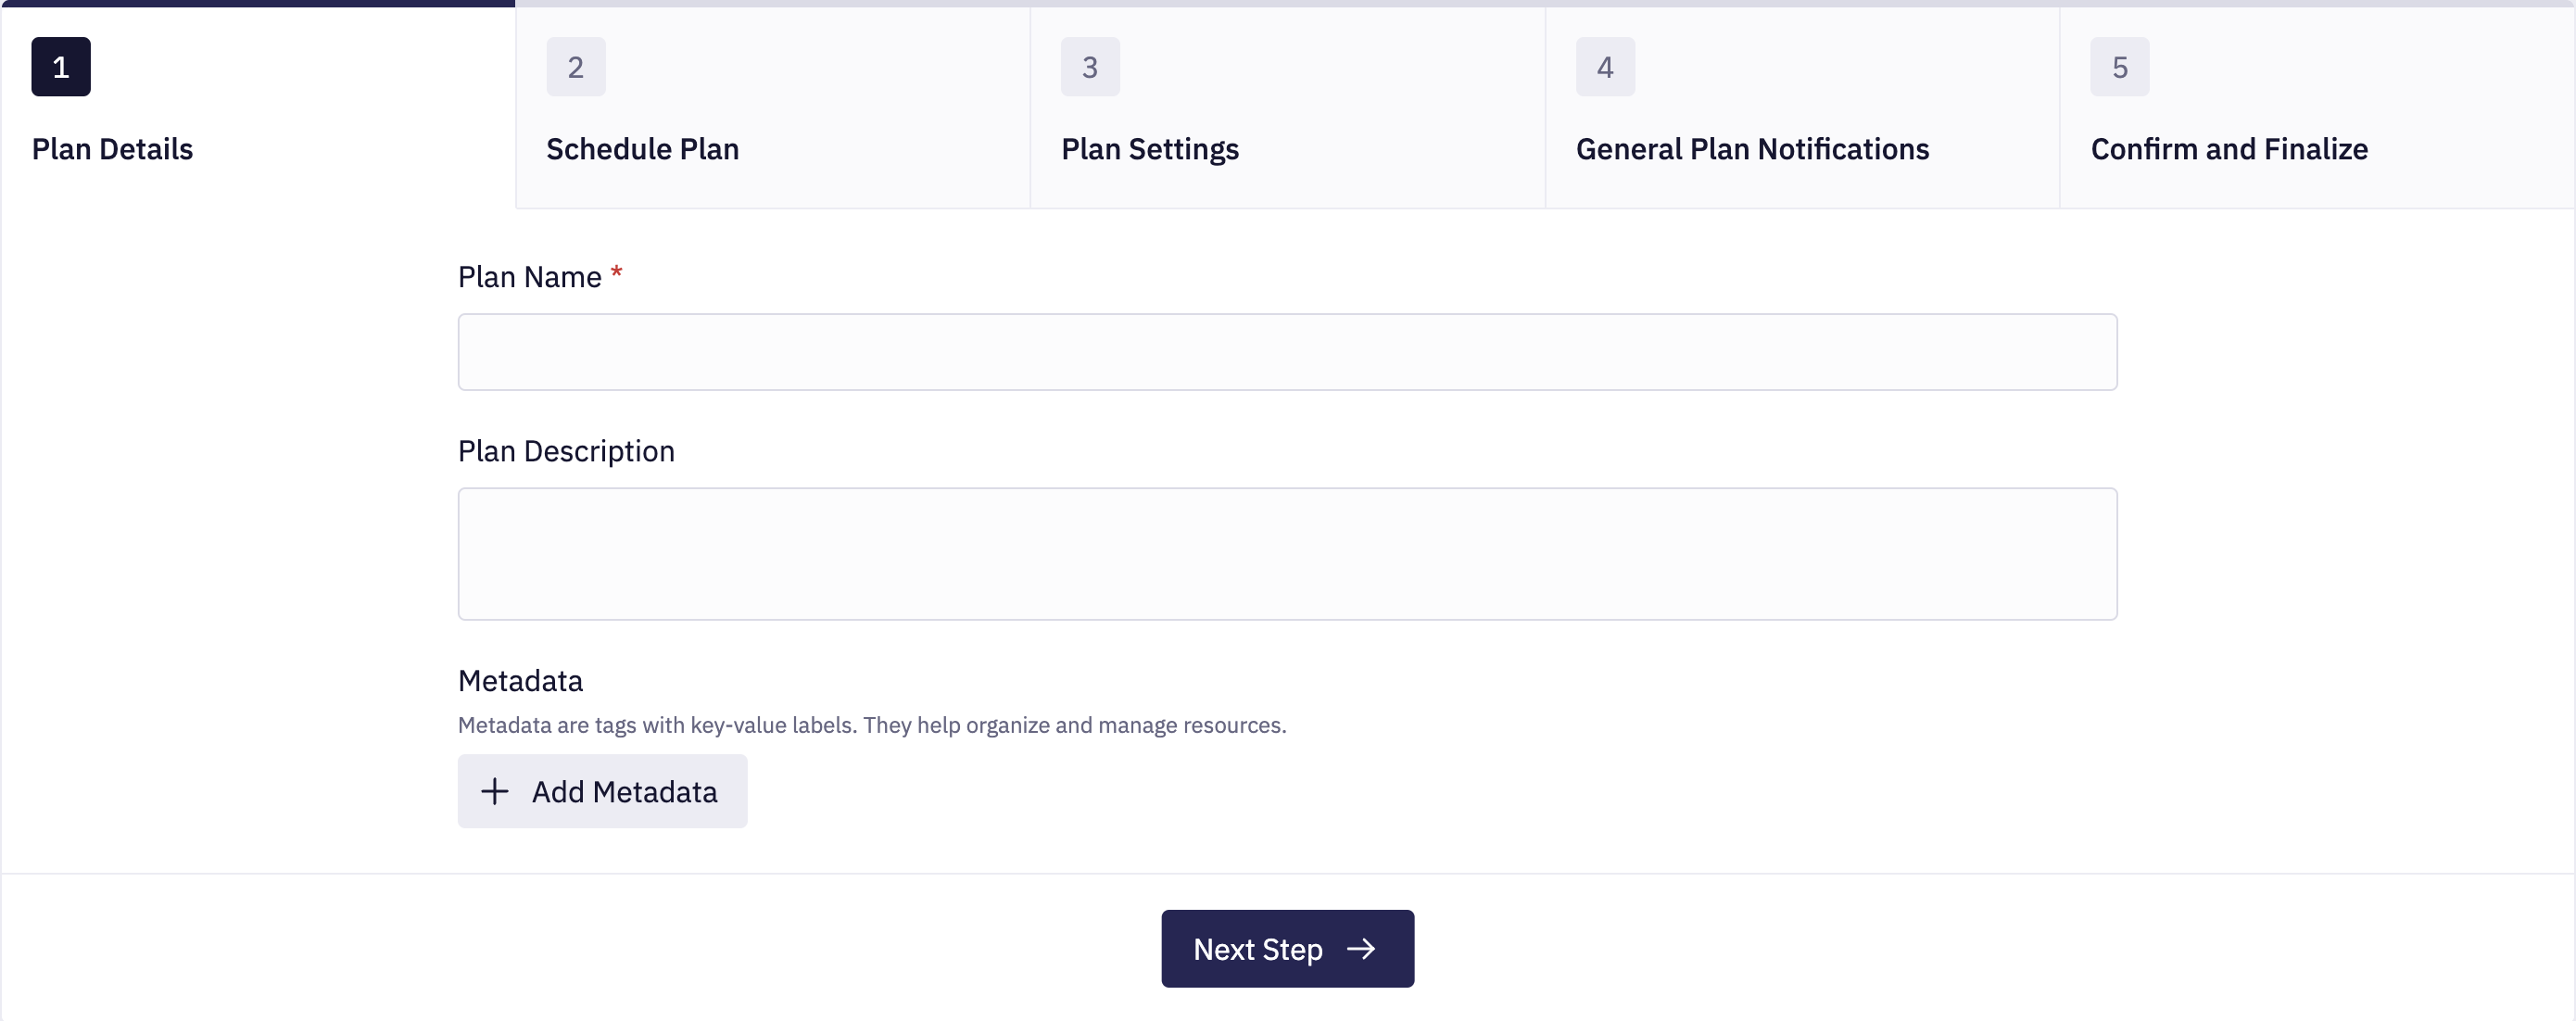
2. Fill in Plan Details
Type the Plan Name and provide a Description.
Click Add Metadata to expand the menu. Add the Tag Key and Tag Value.
3. Schedule Plan
Choose one of the available type of schedules:
- Recurring: Define the timing and frequency for executing the plan based on cron expression and delay.
- Specified Dates: The plan will run at the specified dates.
- On Demand: The plan doesn't have a schedule, so it won't be run automatically, but can be manually run as needed.
Recurring schedule
Select Plan Timezone.
Next, enter the desired schedule as Cron Window Start in Cron format.
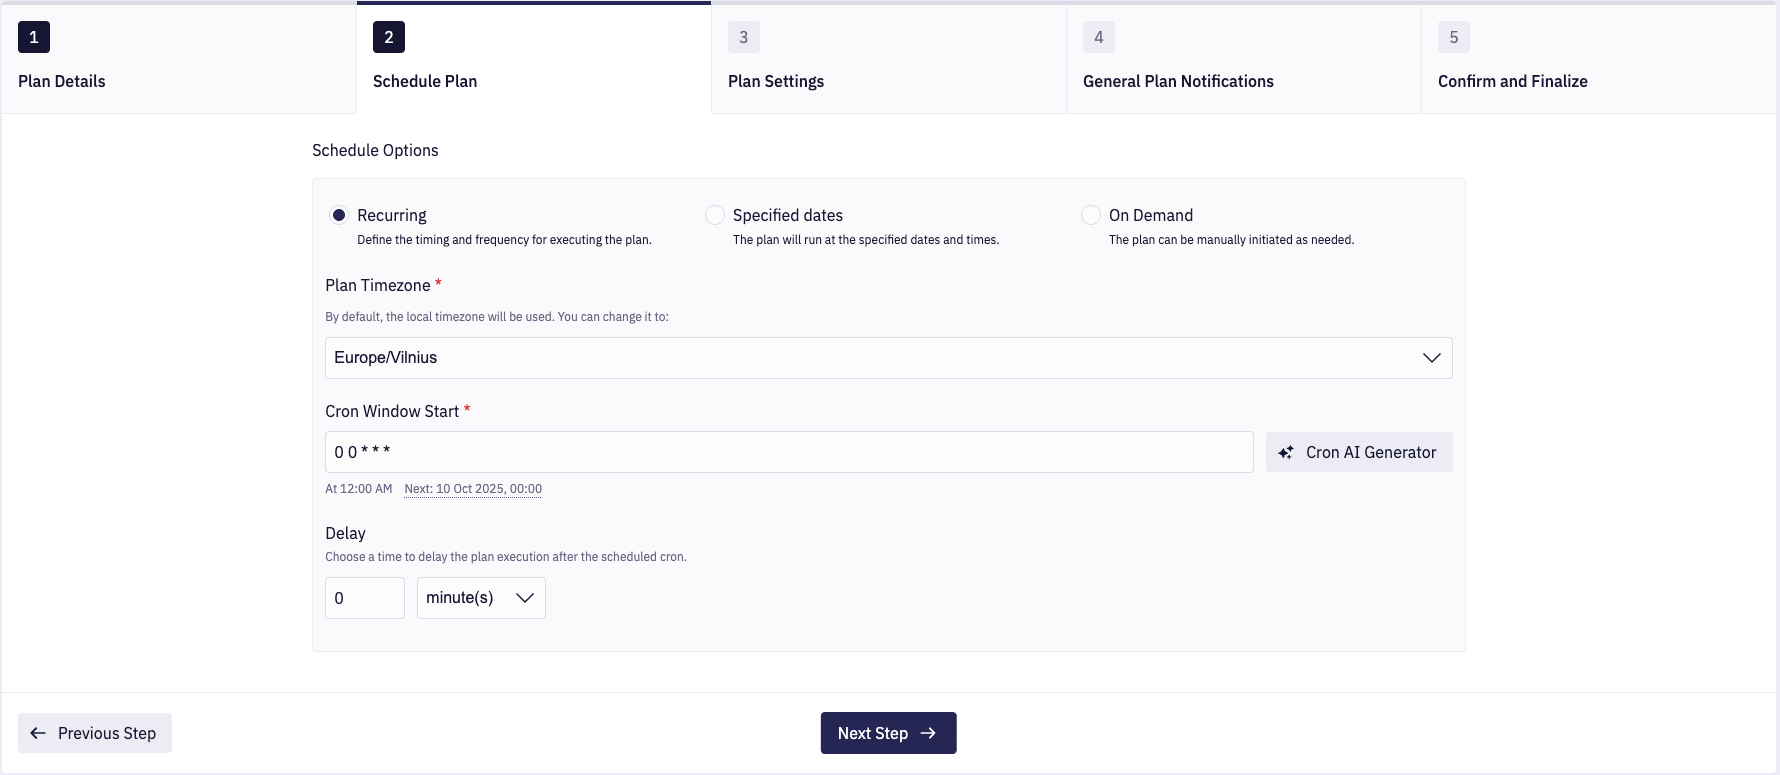
You can use the AI assistant to create cron expressions. Click the Cron AI Generator button next to the cron input field. In the sidebar that opens, enter a description of the cron expression you want, then click Generate or press Enter. If there are no errors, the sidebar will close automatically, and the generated cron expression will appear in the cron input field.
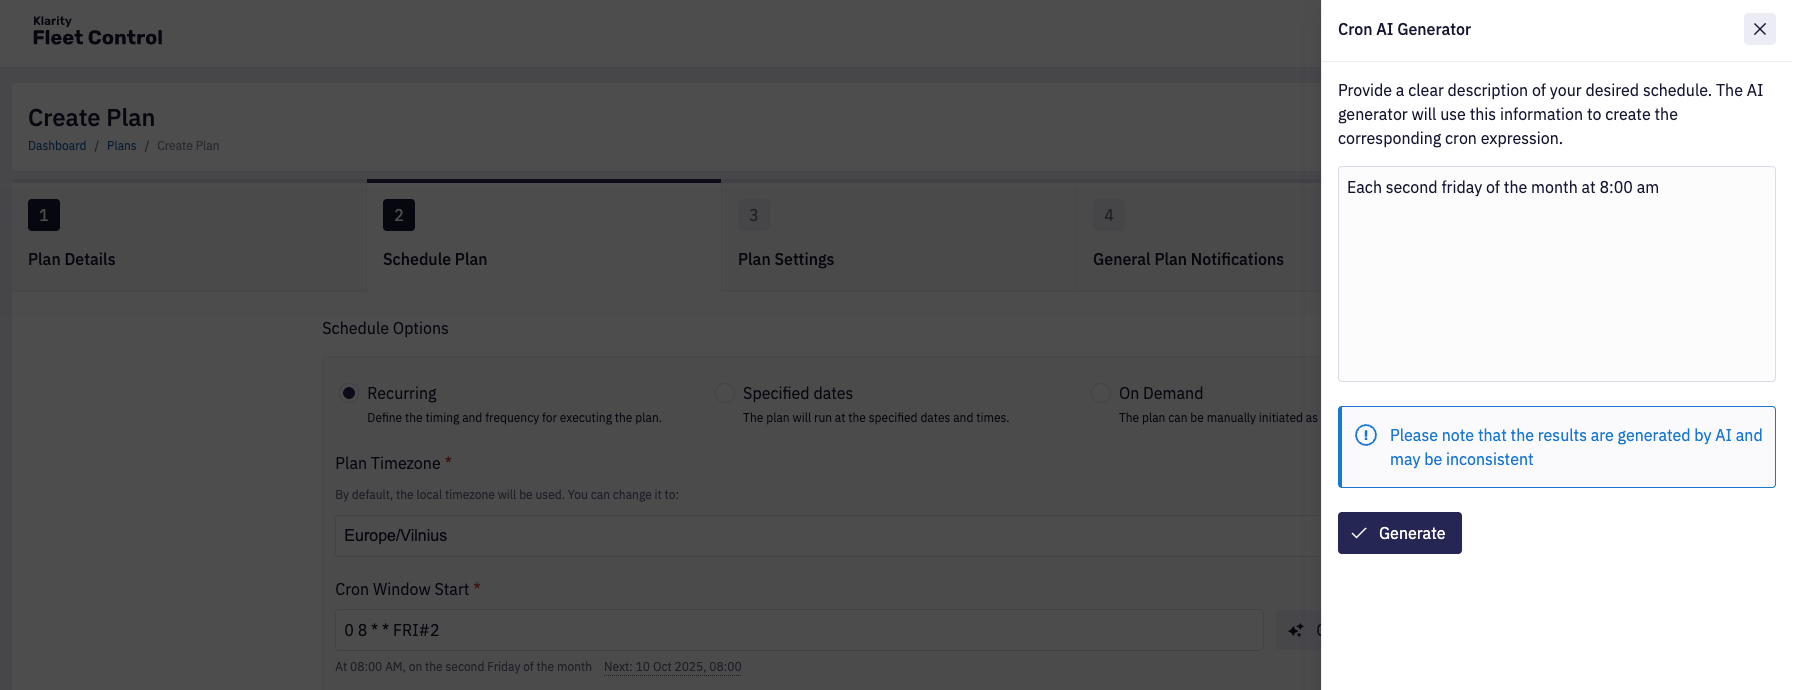
Cron expression is checked for errors and the next execution date is displayed below the expression field.
Hover on the next execution date to see a few more dates generated by expression.
Then, there is also an option to Delay the plan execution after the scheduled cron.
Specified Dates schedule
Select Plan Timezone.
Next, add desired schedule dates by clicking on Add Date button.
Specify date by clicking at calendar icon for the date field and clock icon for the time.
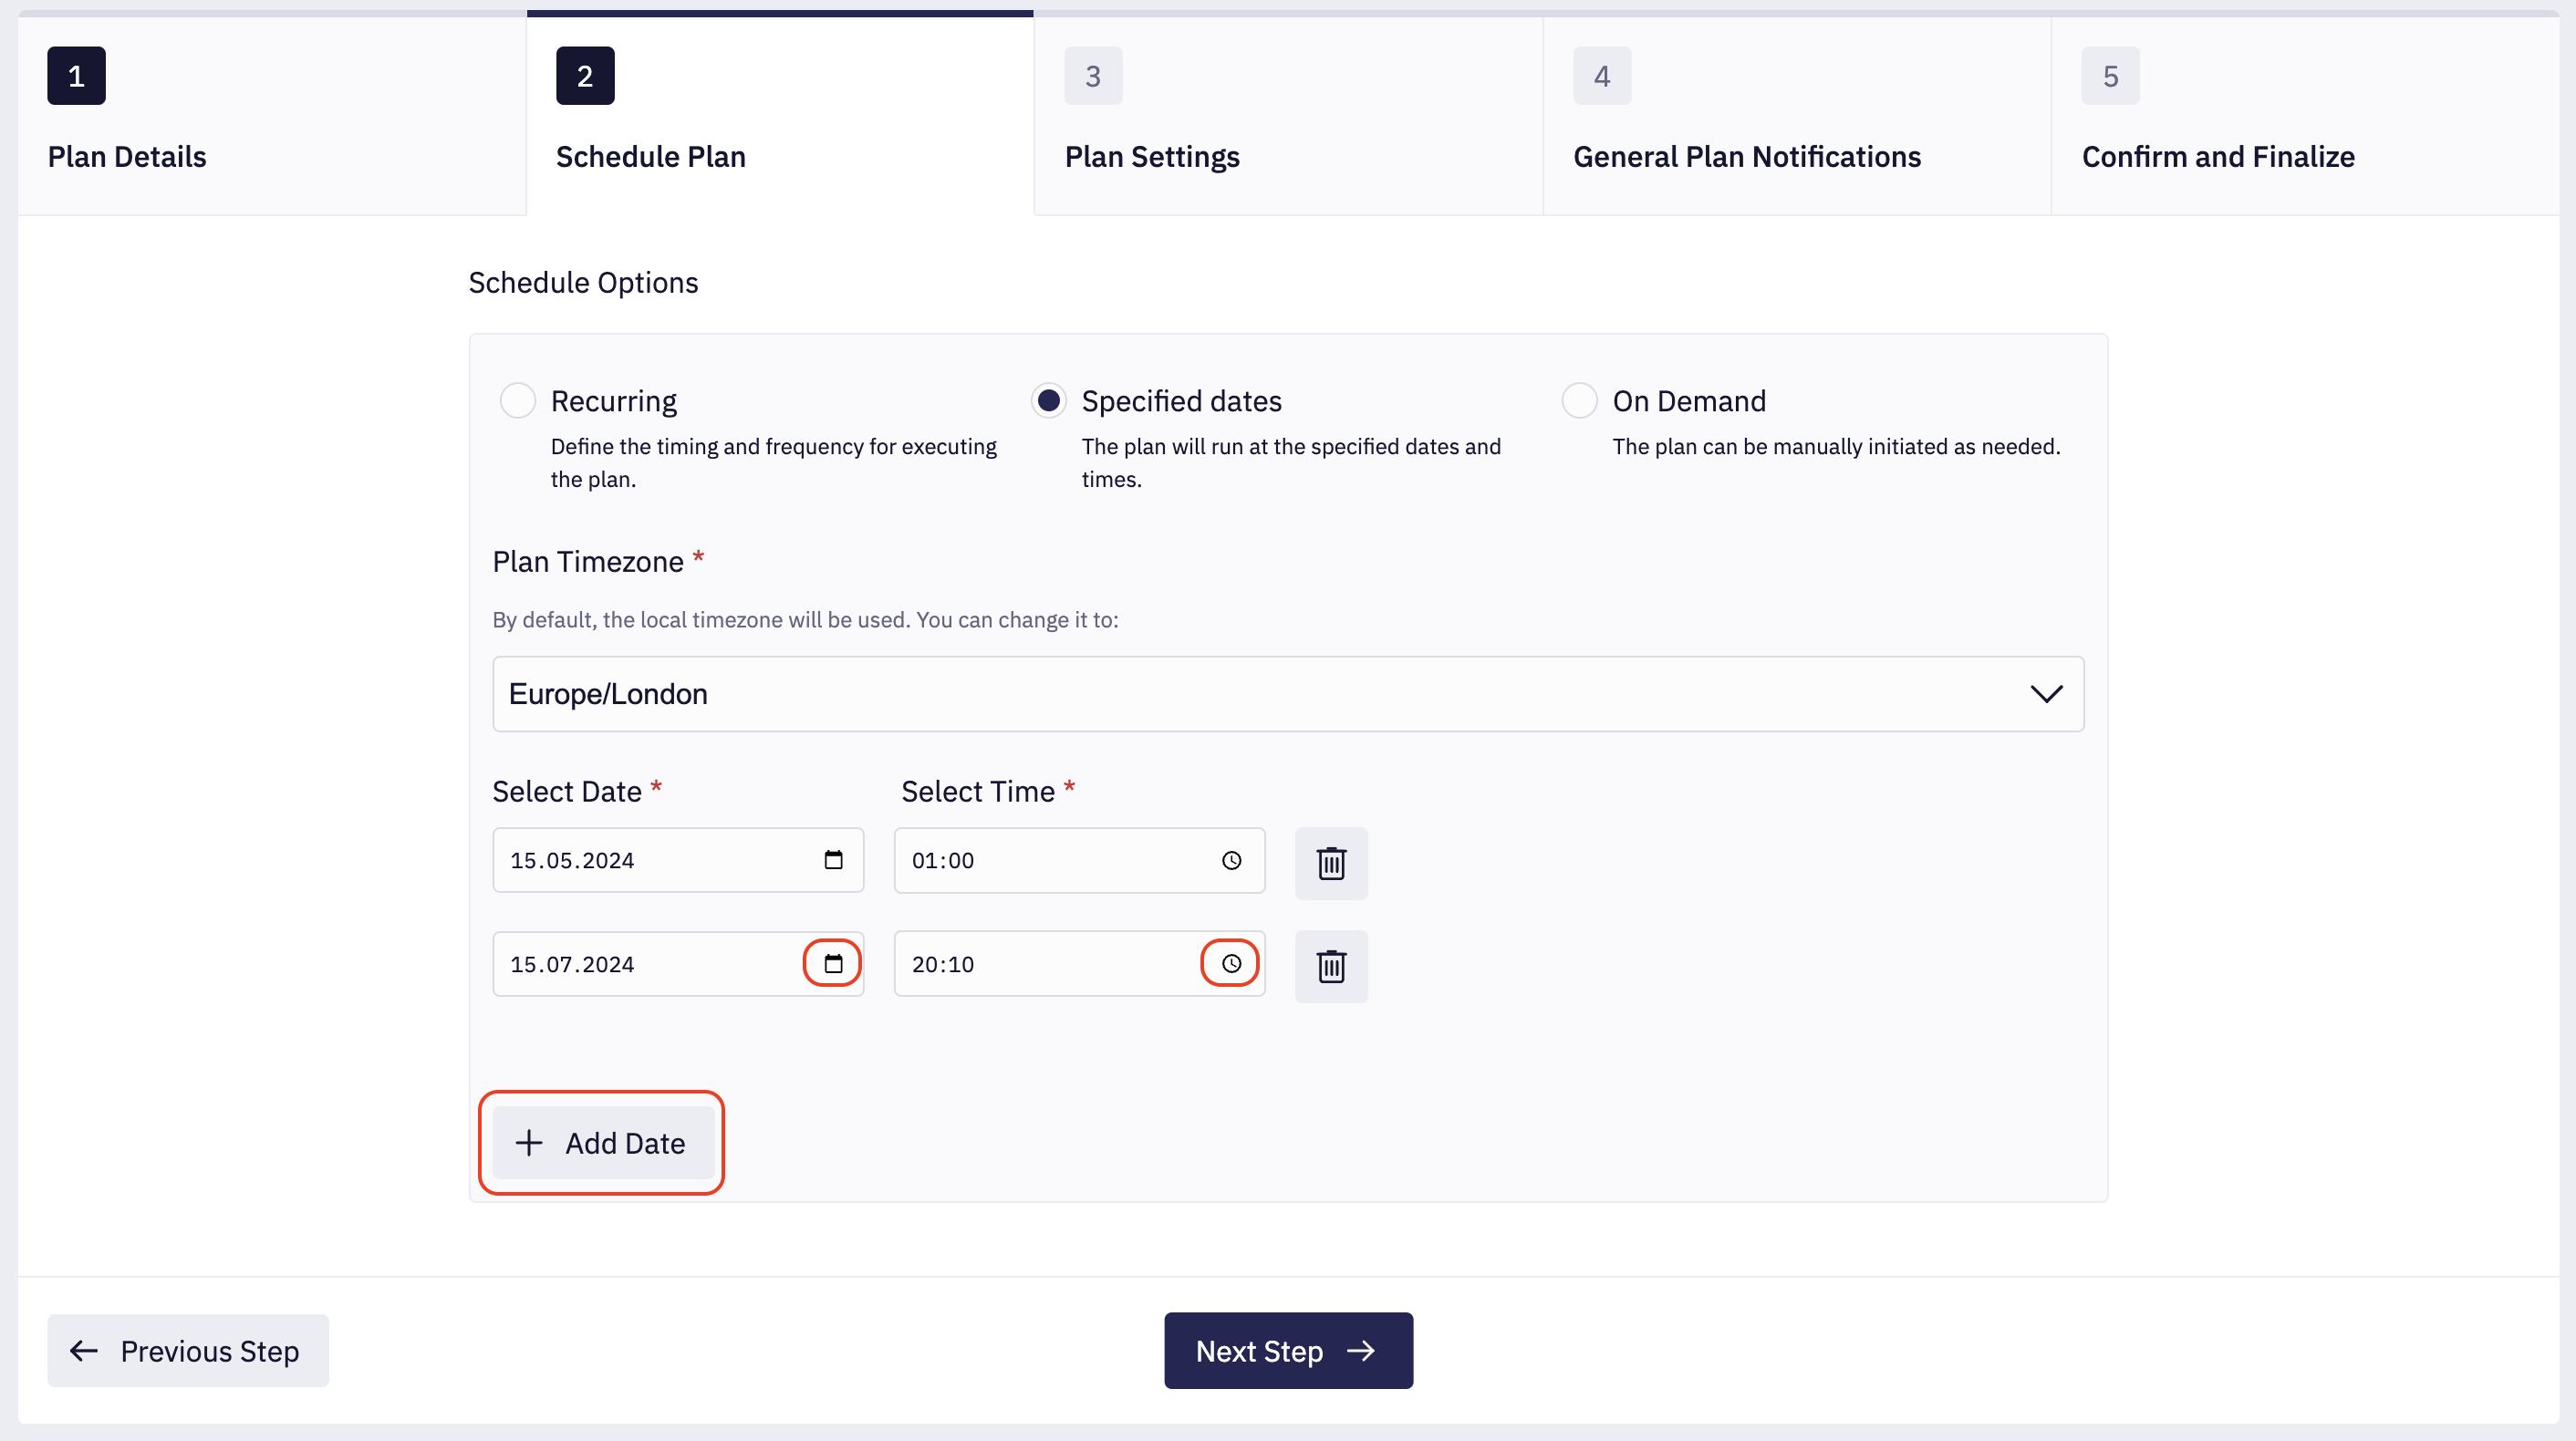
At least one date is required. Only future dates for the selected timezone are allowed.
On Demand schedule
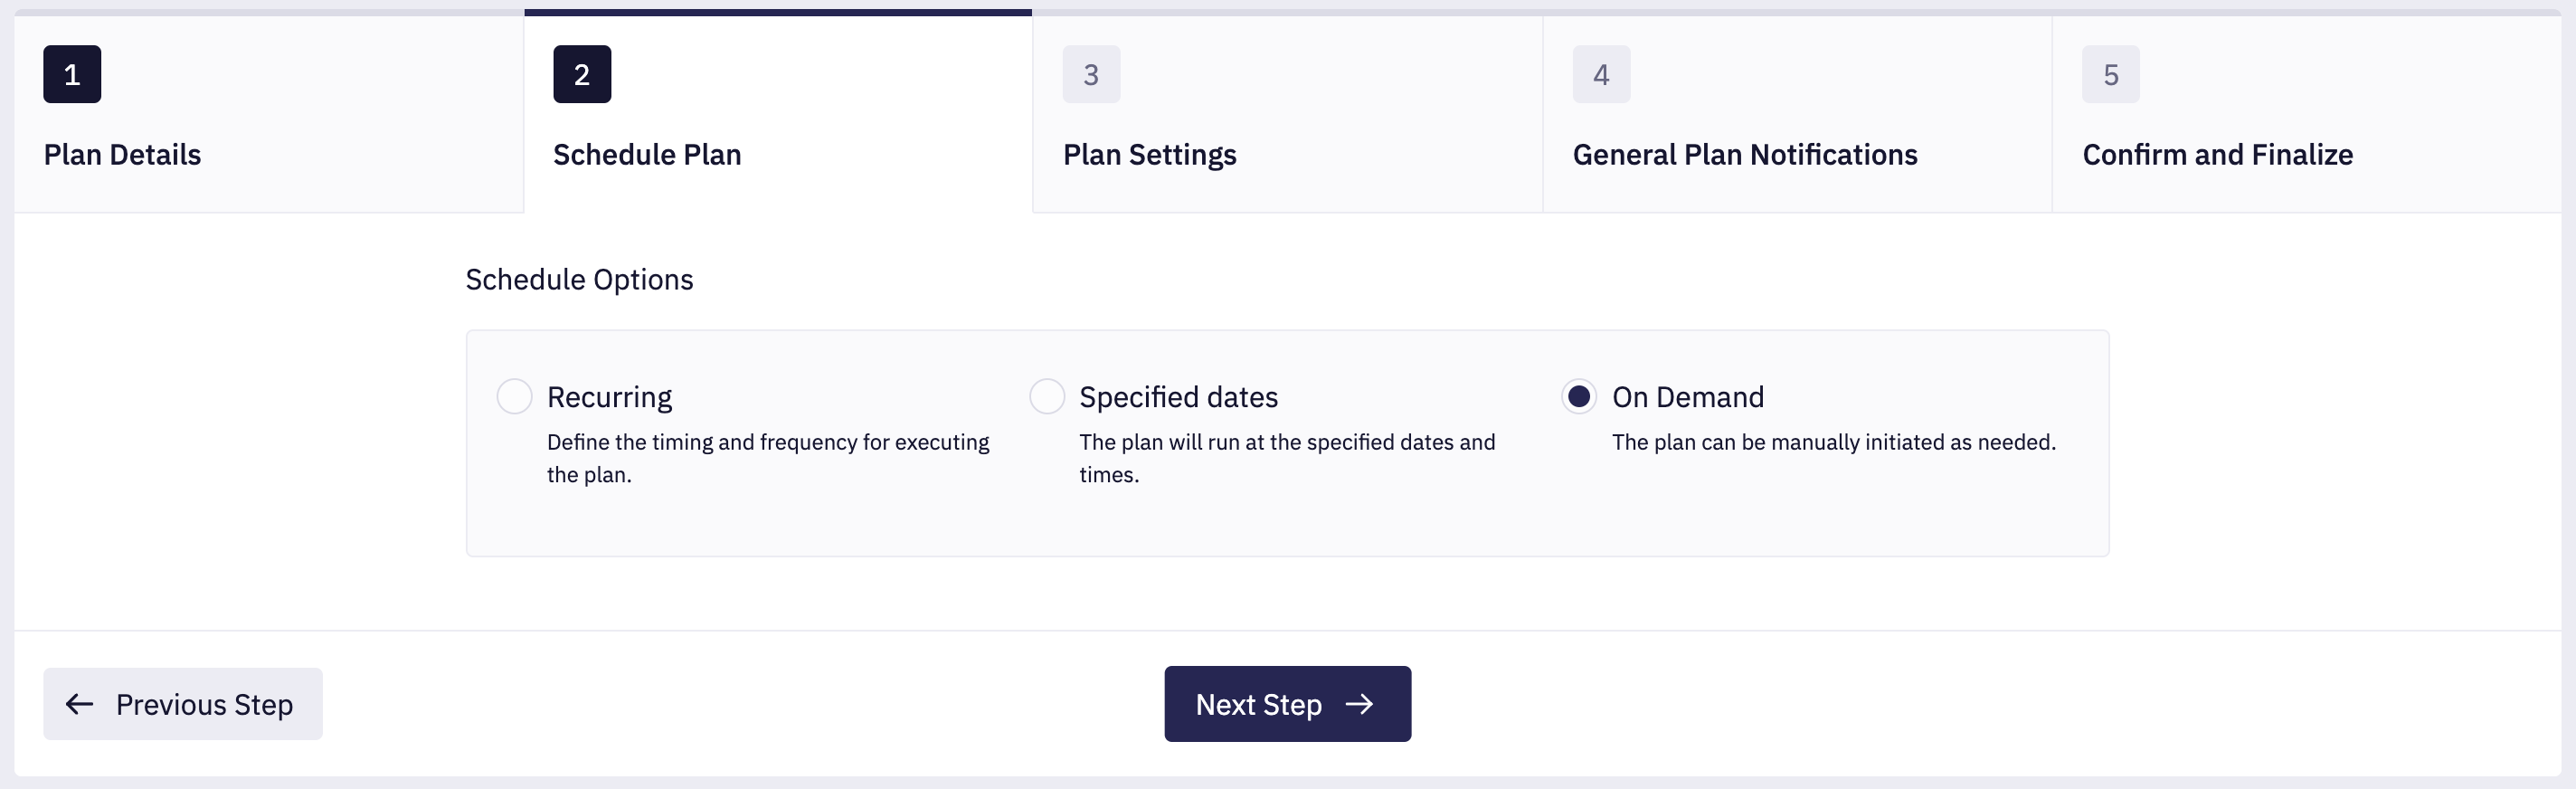
No additional settings are required for this schedule type. The plan can be manually initiated as needed (see Plan operations).
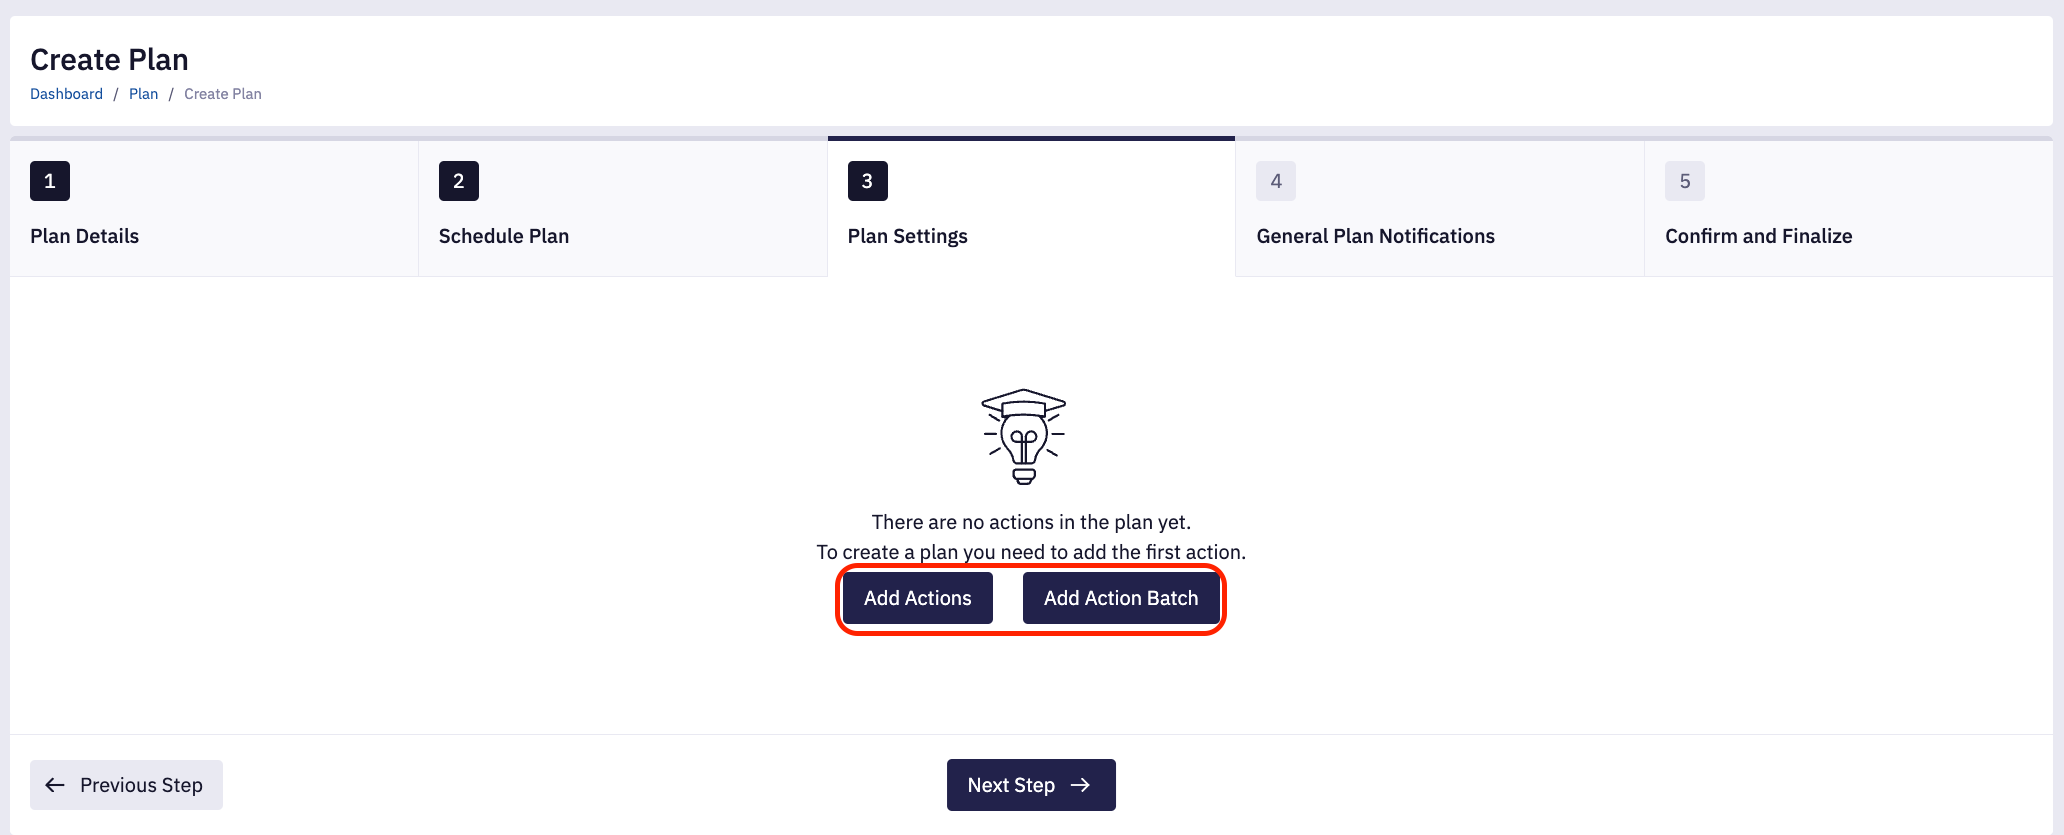
4. Plan Settings
In this step you will define Plan steps. To add the first one, click Add Actions or Add Action Batch.
For detailed overview of adding action batch, please refer to the dedicated section Create a Batch while creating a Plan.
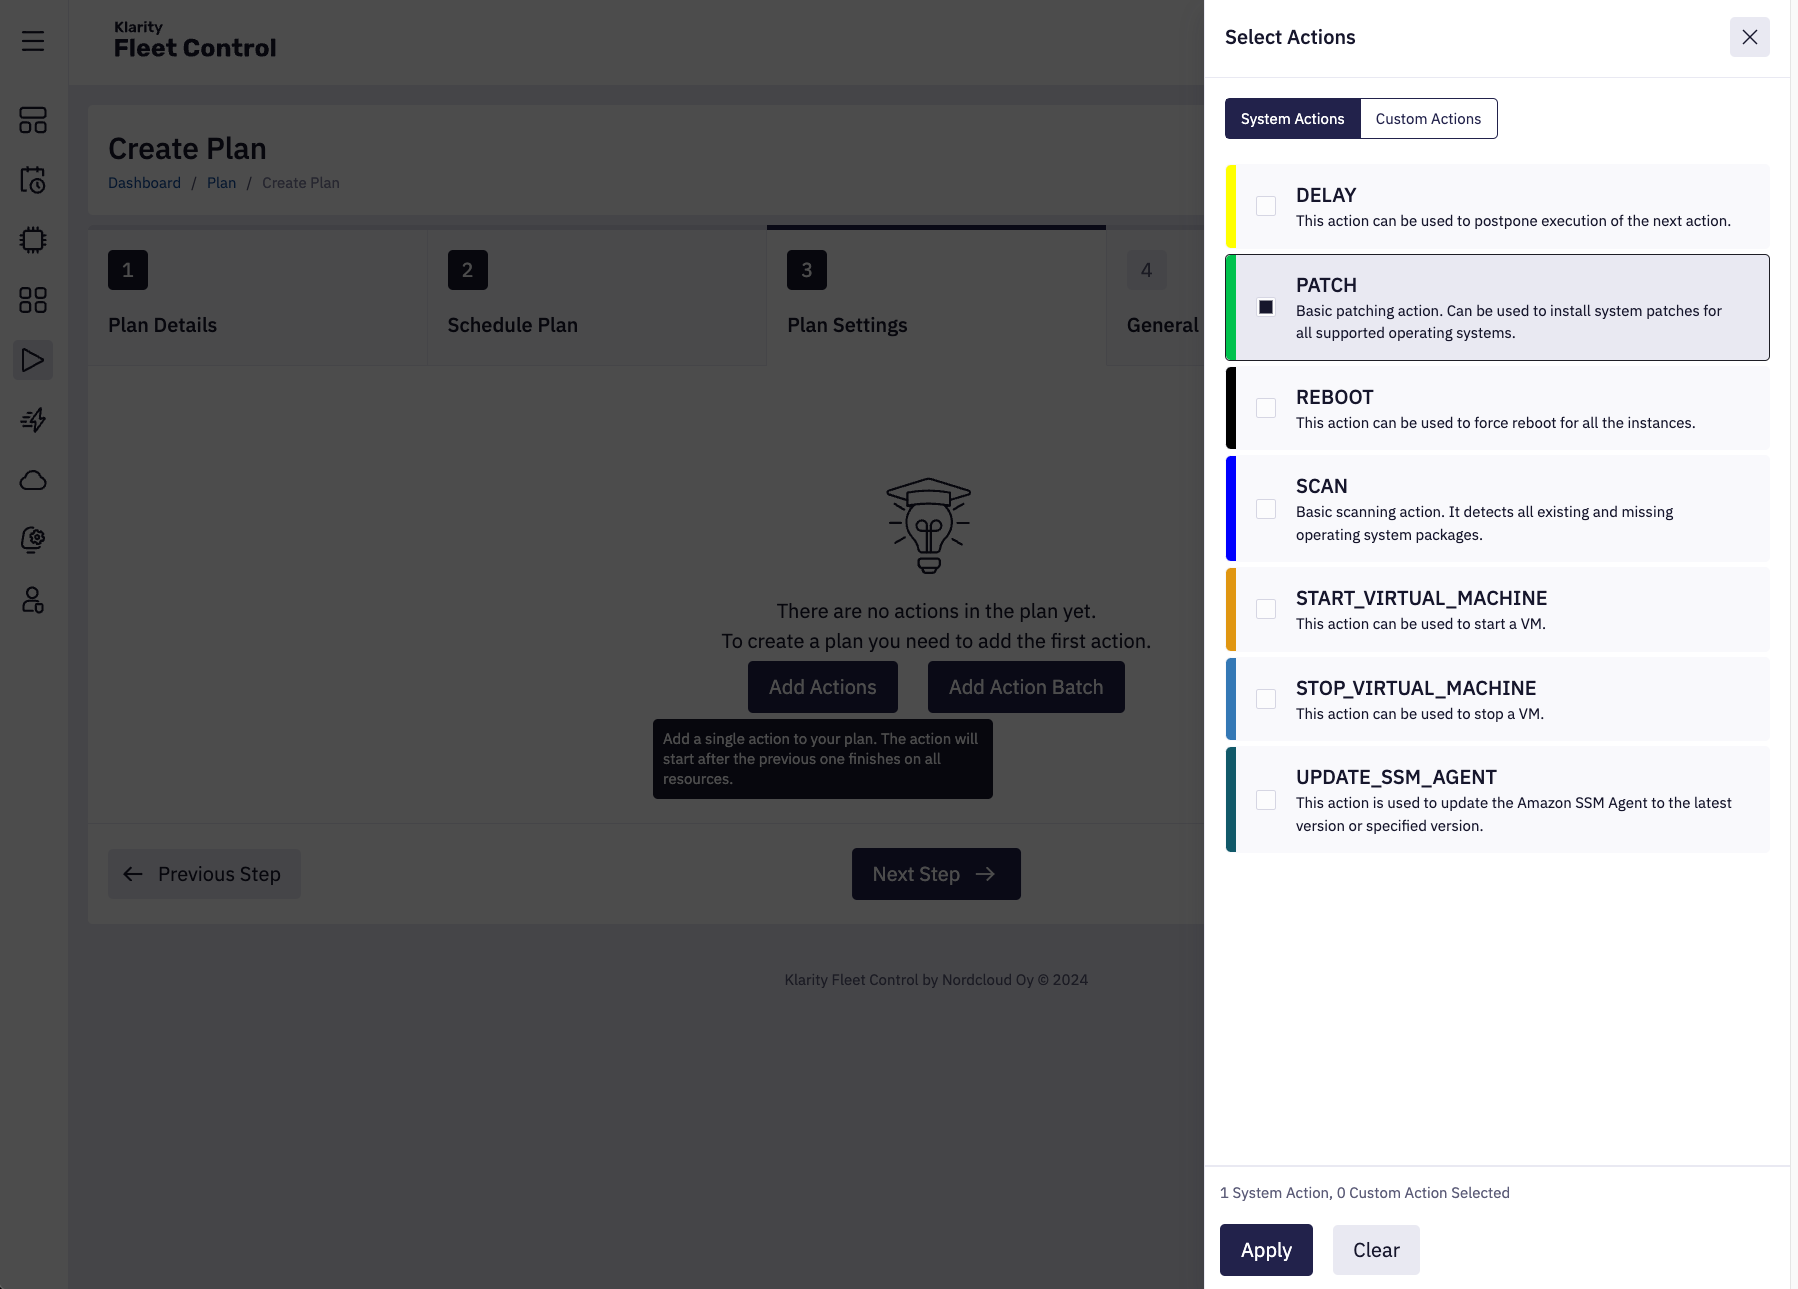
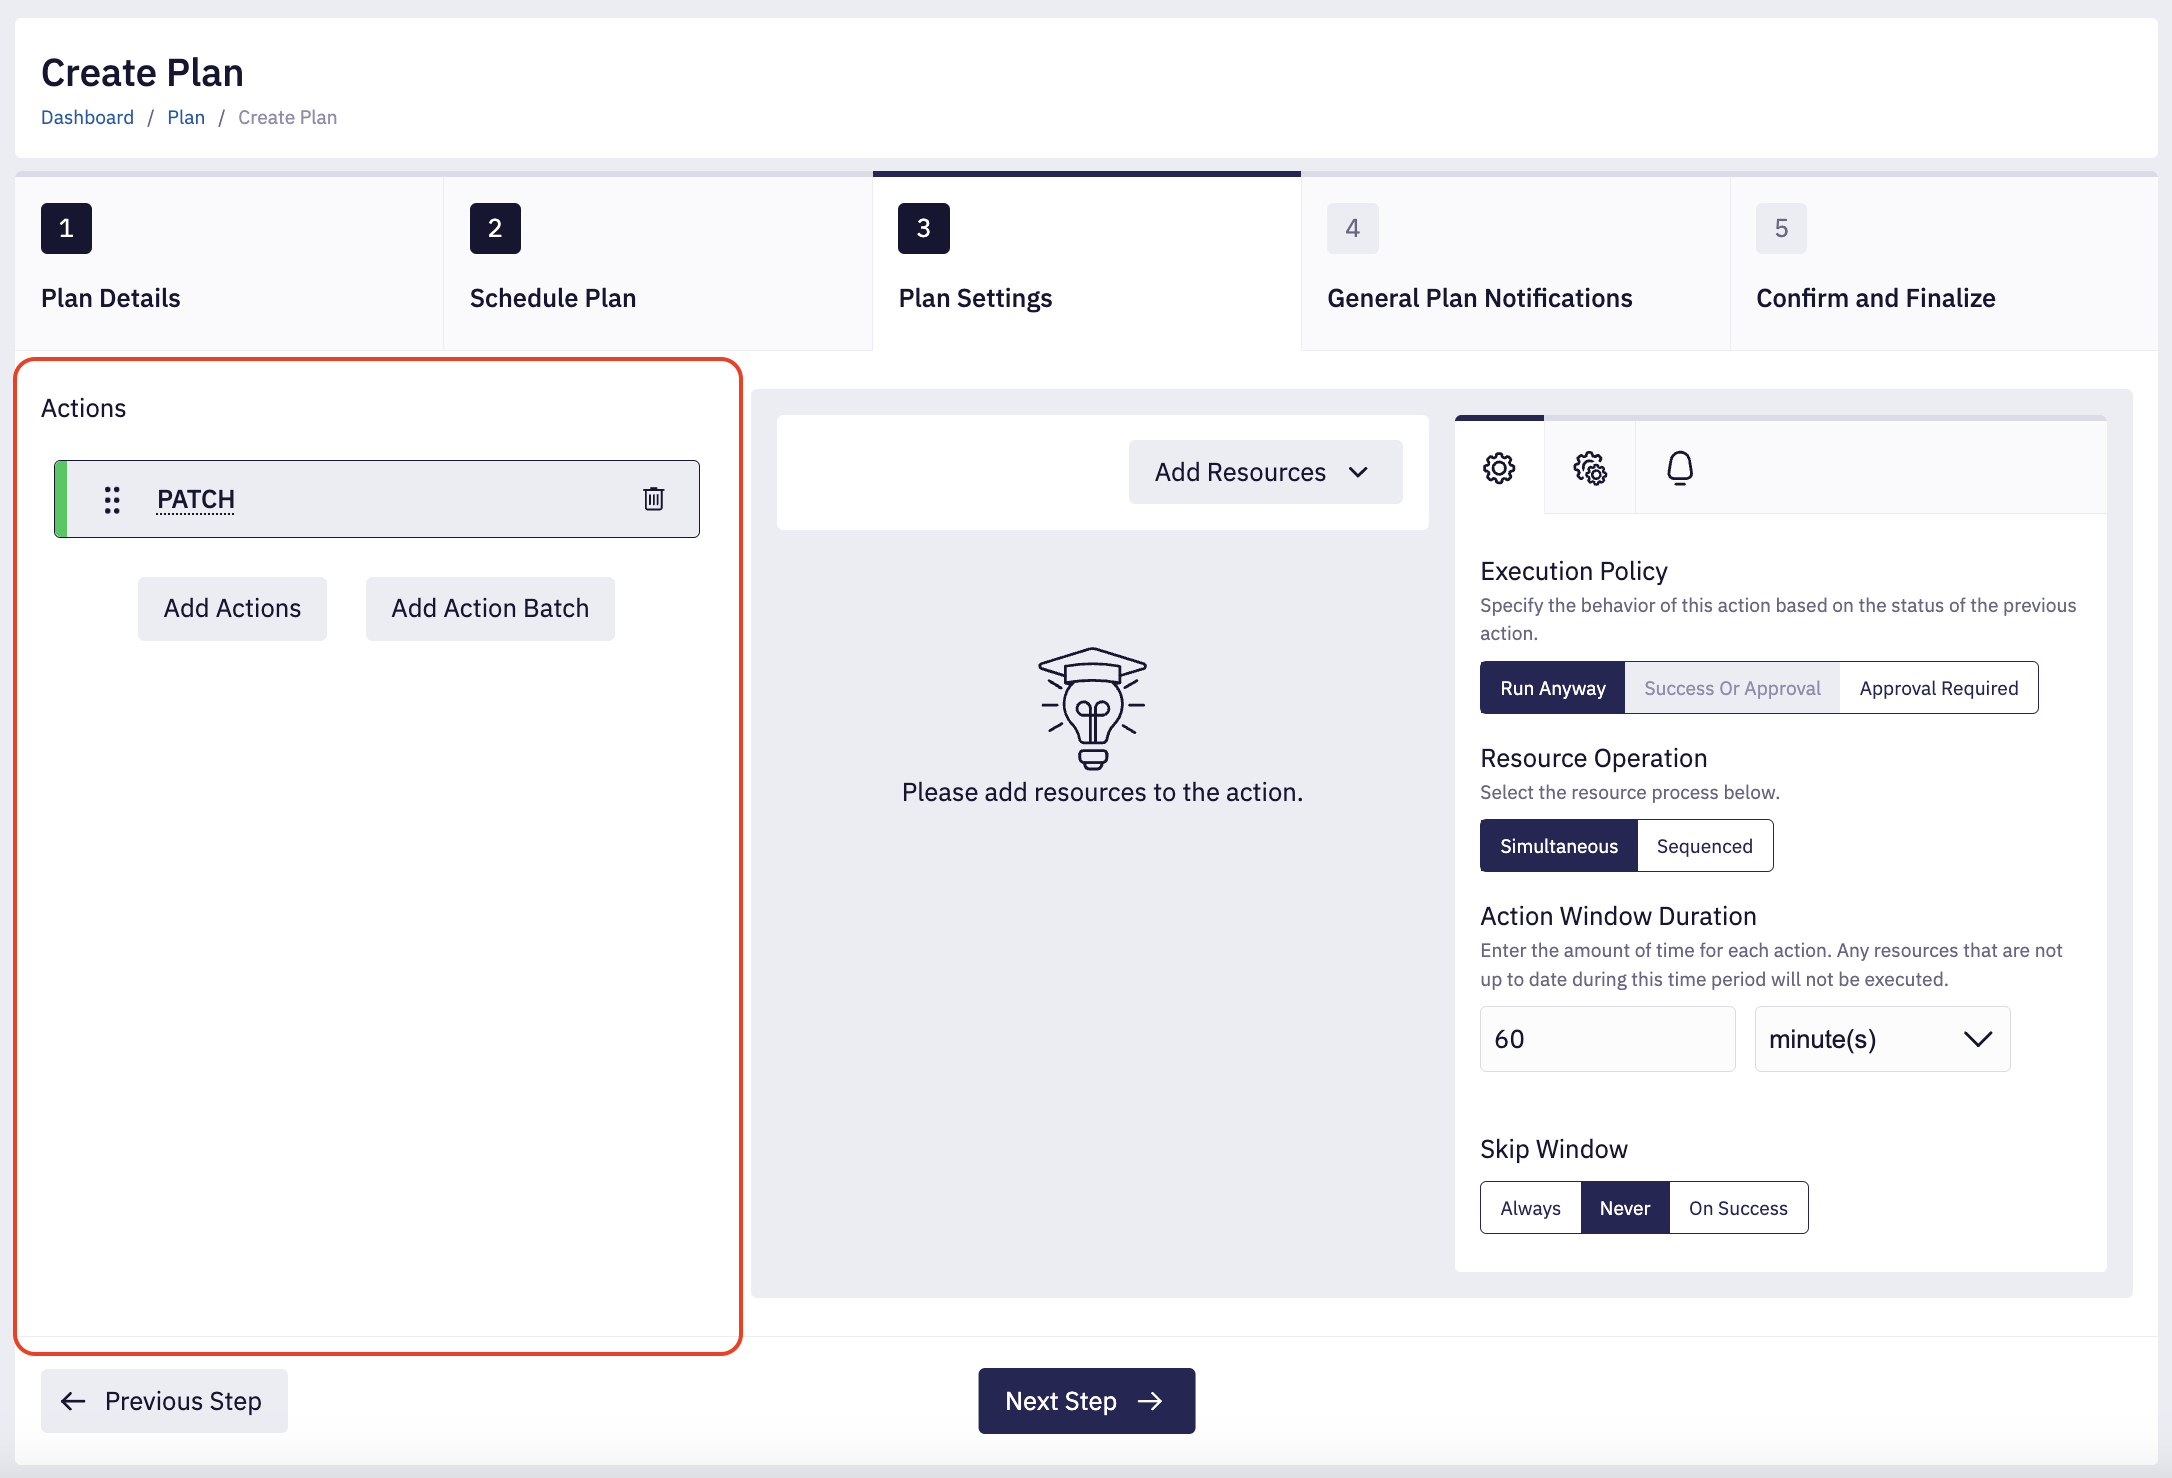
After clicking Add Action select one of the two actions: System or Custom. When you add at least one action to the plan, the view changes, and three distinct sections described below appear.
5. Actions section
In this section you can see all actions added to the plan. You can add more actions by clicking Add Action. Rearrange the order of actions by dragging and dropping them (click on the dots next to action name). Removing an action is done by clicking the trash bin icon next to its name.
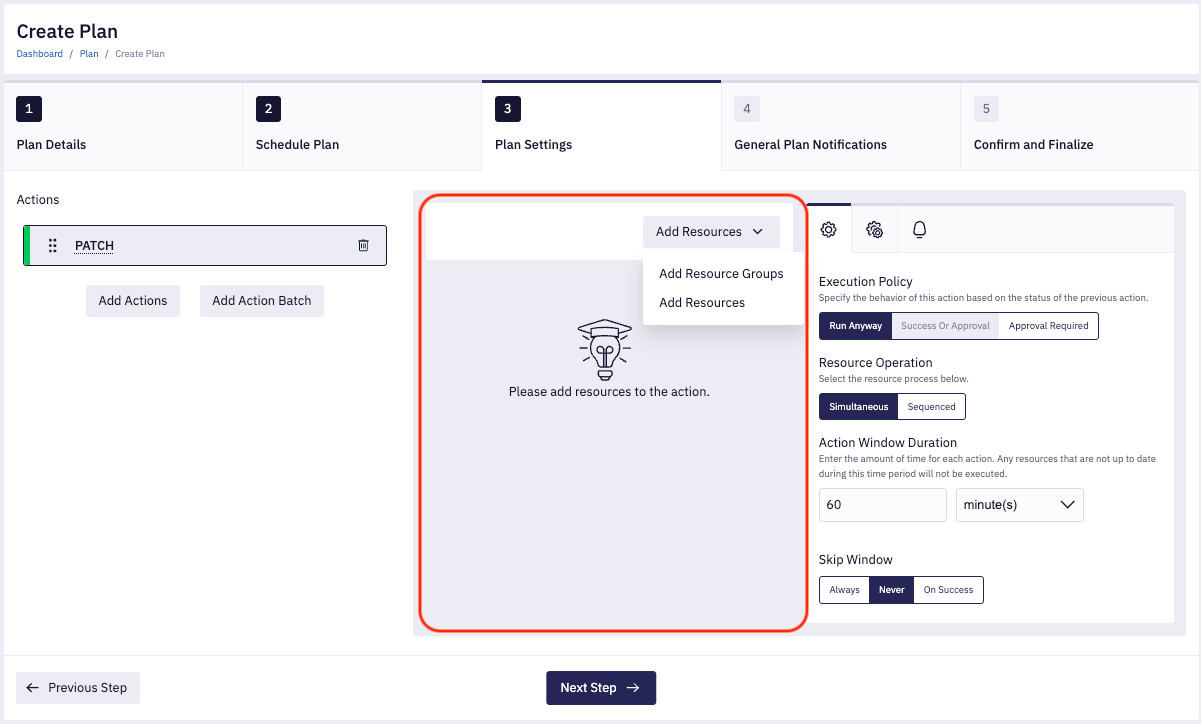
6. Resources section
In this section you can specify the resources and resource groups on which the action will be performed.
Click Add Resources (this is to be done separately for each action)
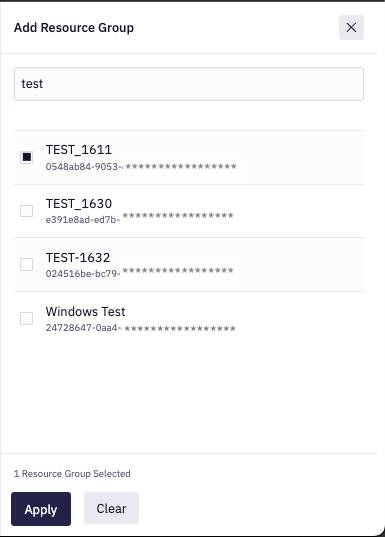
Resource Groups selection
You can select resource groups from the list of available resource groups or search for them by name.
Resource selection
You can select resources from the list of available resources or search for them by name.
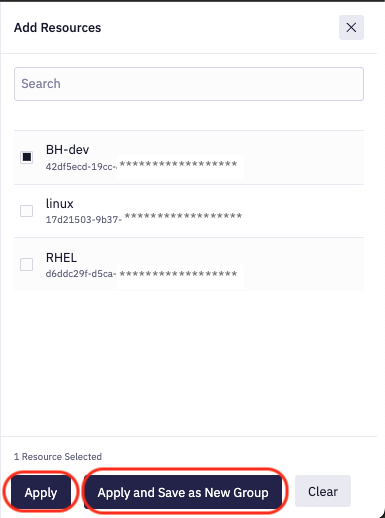
Apply will add selected resources directly to the action. Apply and Save as new Group button will open a modal window where you can create a new resource group with selected resources. Created resource group will be added to the action and will be available for future use in other actions.
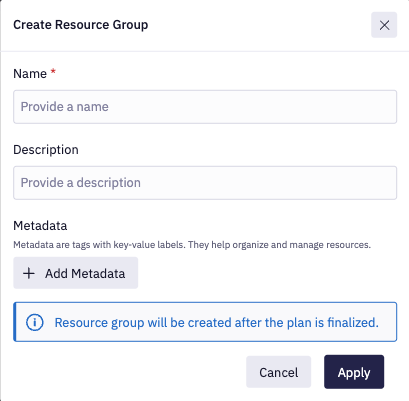
Resource groups created during the plan creation are created during the plan submission. If the plan is not submitted the resource group will not be created.
7. Action Settings
In this section you should define settings for each action; there are three tabs.
- General Action Settings
- Advanced Action Settings
- Action Notifications
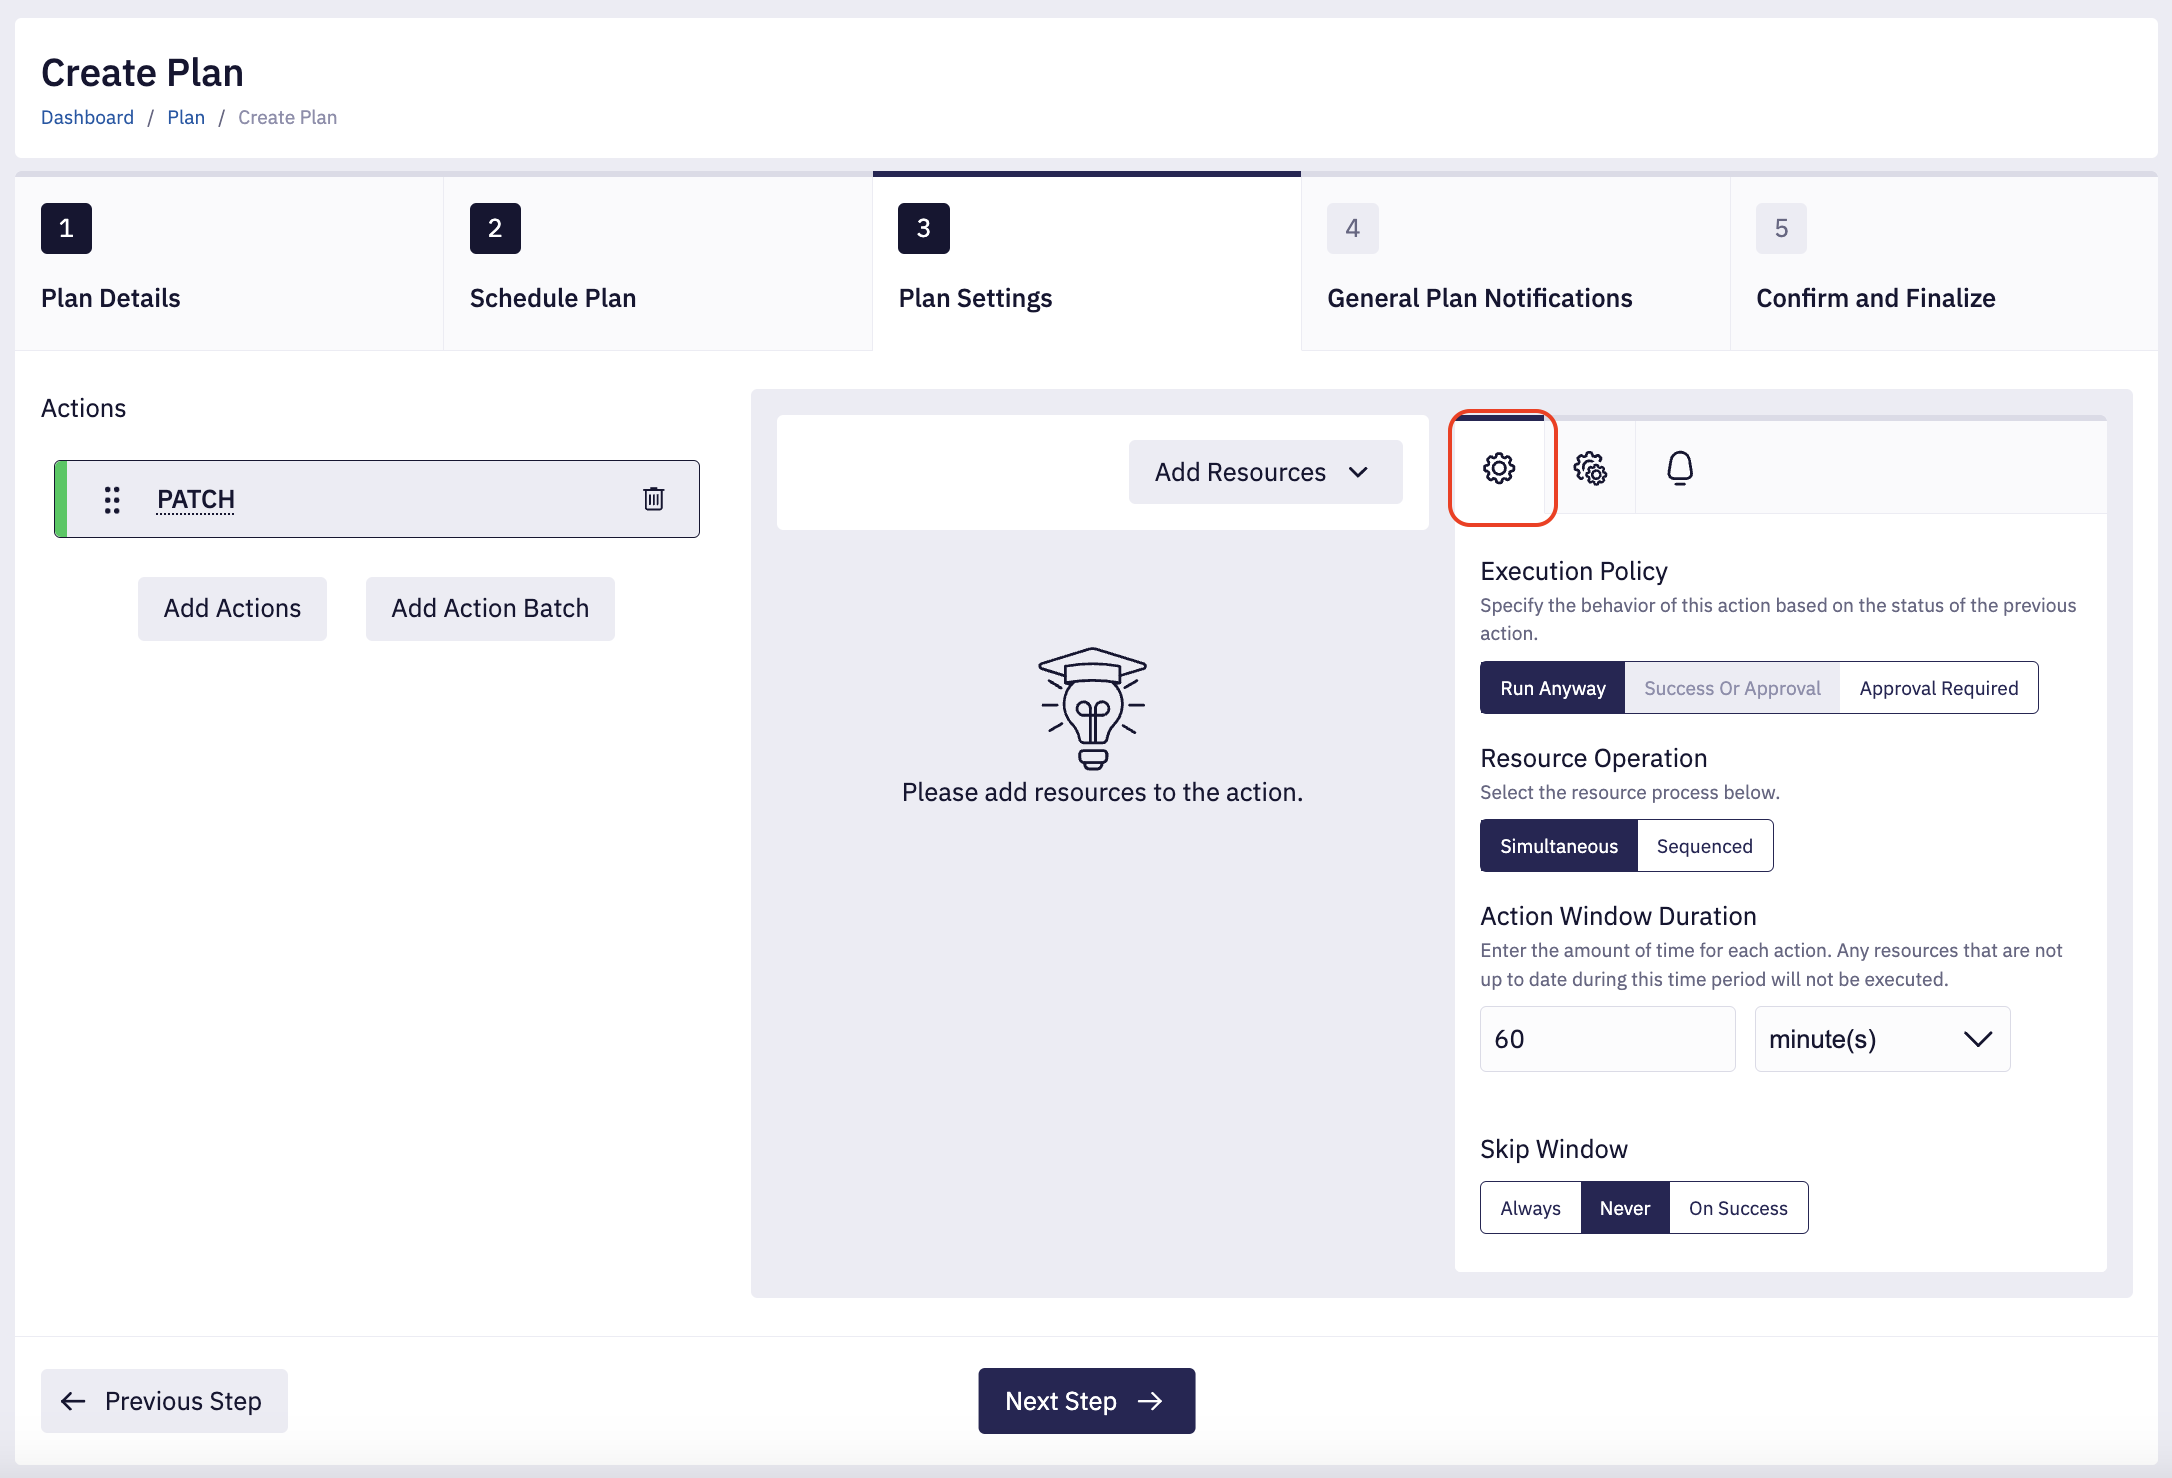
1. Action Execution Policy
If an action fails (including cases where approval timeout occurs, indicating that the approval wasn't granted within the assigned time), the next action's execution policy will determine what happens next. There are three possible policies: Run Anyway, Approval Required, and Success or Approval. The default execution policy is Run Anyway.
-
Run Anyway means that the action runs regardless of whether the previous action is successful or failed.
-
Approval Required mandates that manual approval is needed before the action can be executed, regardless of whether the preceding action is successful or failed.
-
Success or Approval specifies that the action is automatically executed only if the previous action was successful, but requires manual approval if the previous action failed. Note that this doesn't apply to the first action.
If you set an action execution policy for an action and there is a delay action before this action, the execution policy settings will apply to the action before the delay action.
For example, if there is a patch action before the delay action, the execution policy settings will apply to the patch action, not the delay action.
2. Resource Operation
There are two ways to execute a task with multiple resources: Simultaneously or Sequentially.
-
Simultaneous lets all resources run at once by handling multiple tasks at the same time.
-
Sequenced runs resources one after the other in a controlled manner.
3. Action Window Duration
Action Window Duration is a specific time frame that must be assigned to each action. This time frame determines the period when the action can be executed. If an action is not completed within its allotted time frame, any resources that were supposed to be executed will not be carried out. Therefore, it is essential to manage your time effectively.
4. Skip Window
Skip window configurations are necessary as there are three different settings:
-
Always bypasses the window duration once the action has run on all resource groups.
-
Never maintains sequential flow by starting the following action automatically according to the specified window duration.
-
On Success automatically skips the window if the action is successfully applied to the resource groups, making the workflow faster and more efficient.
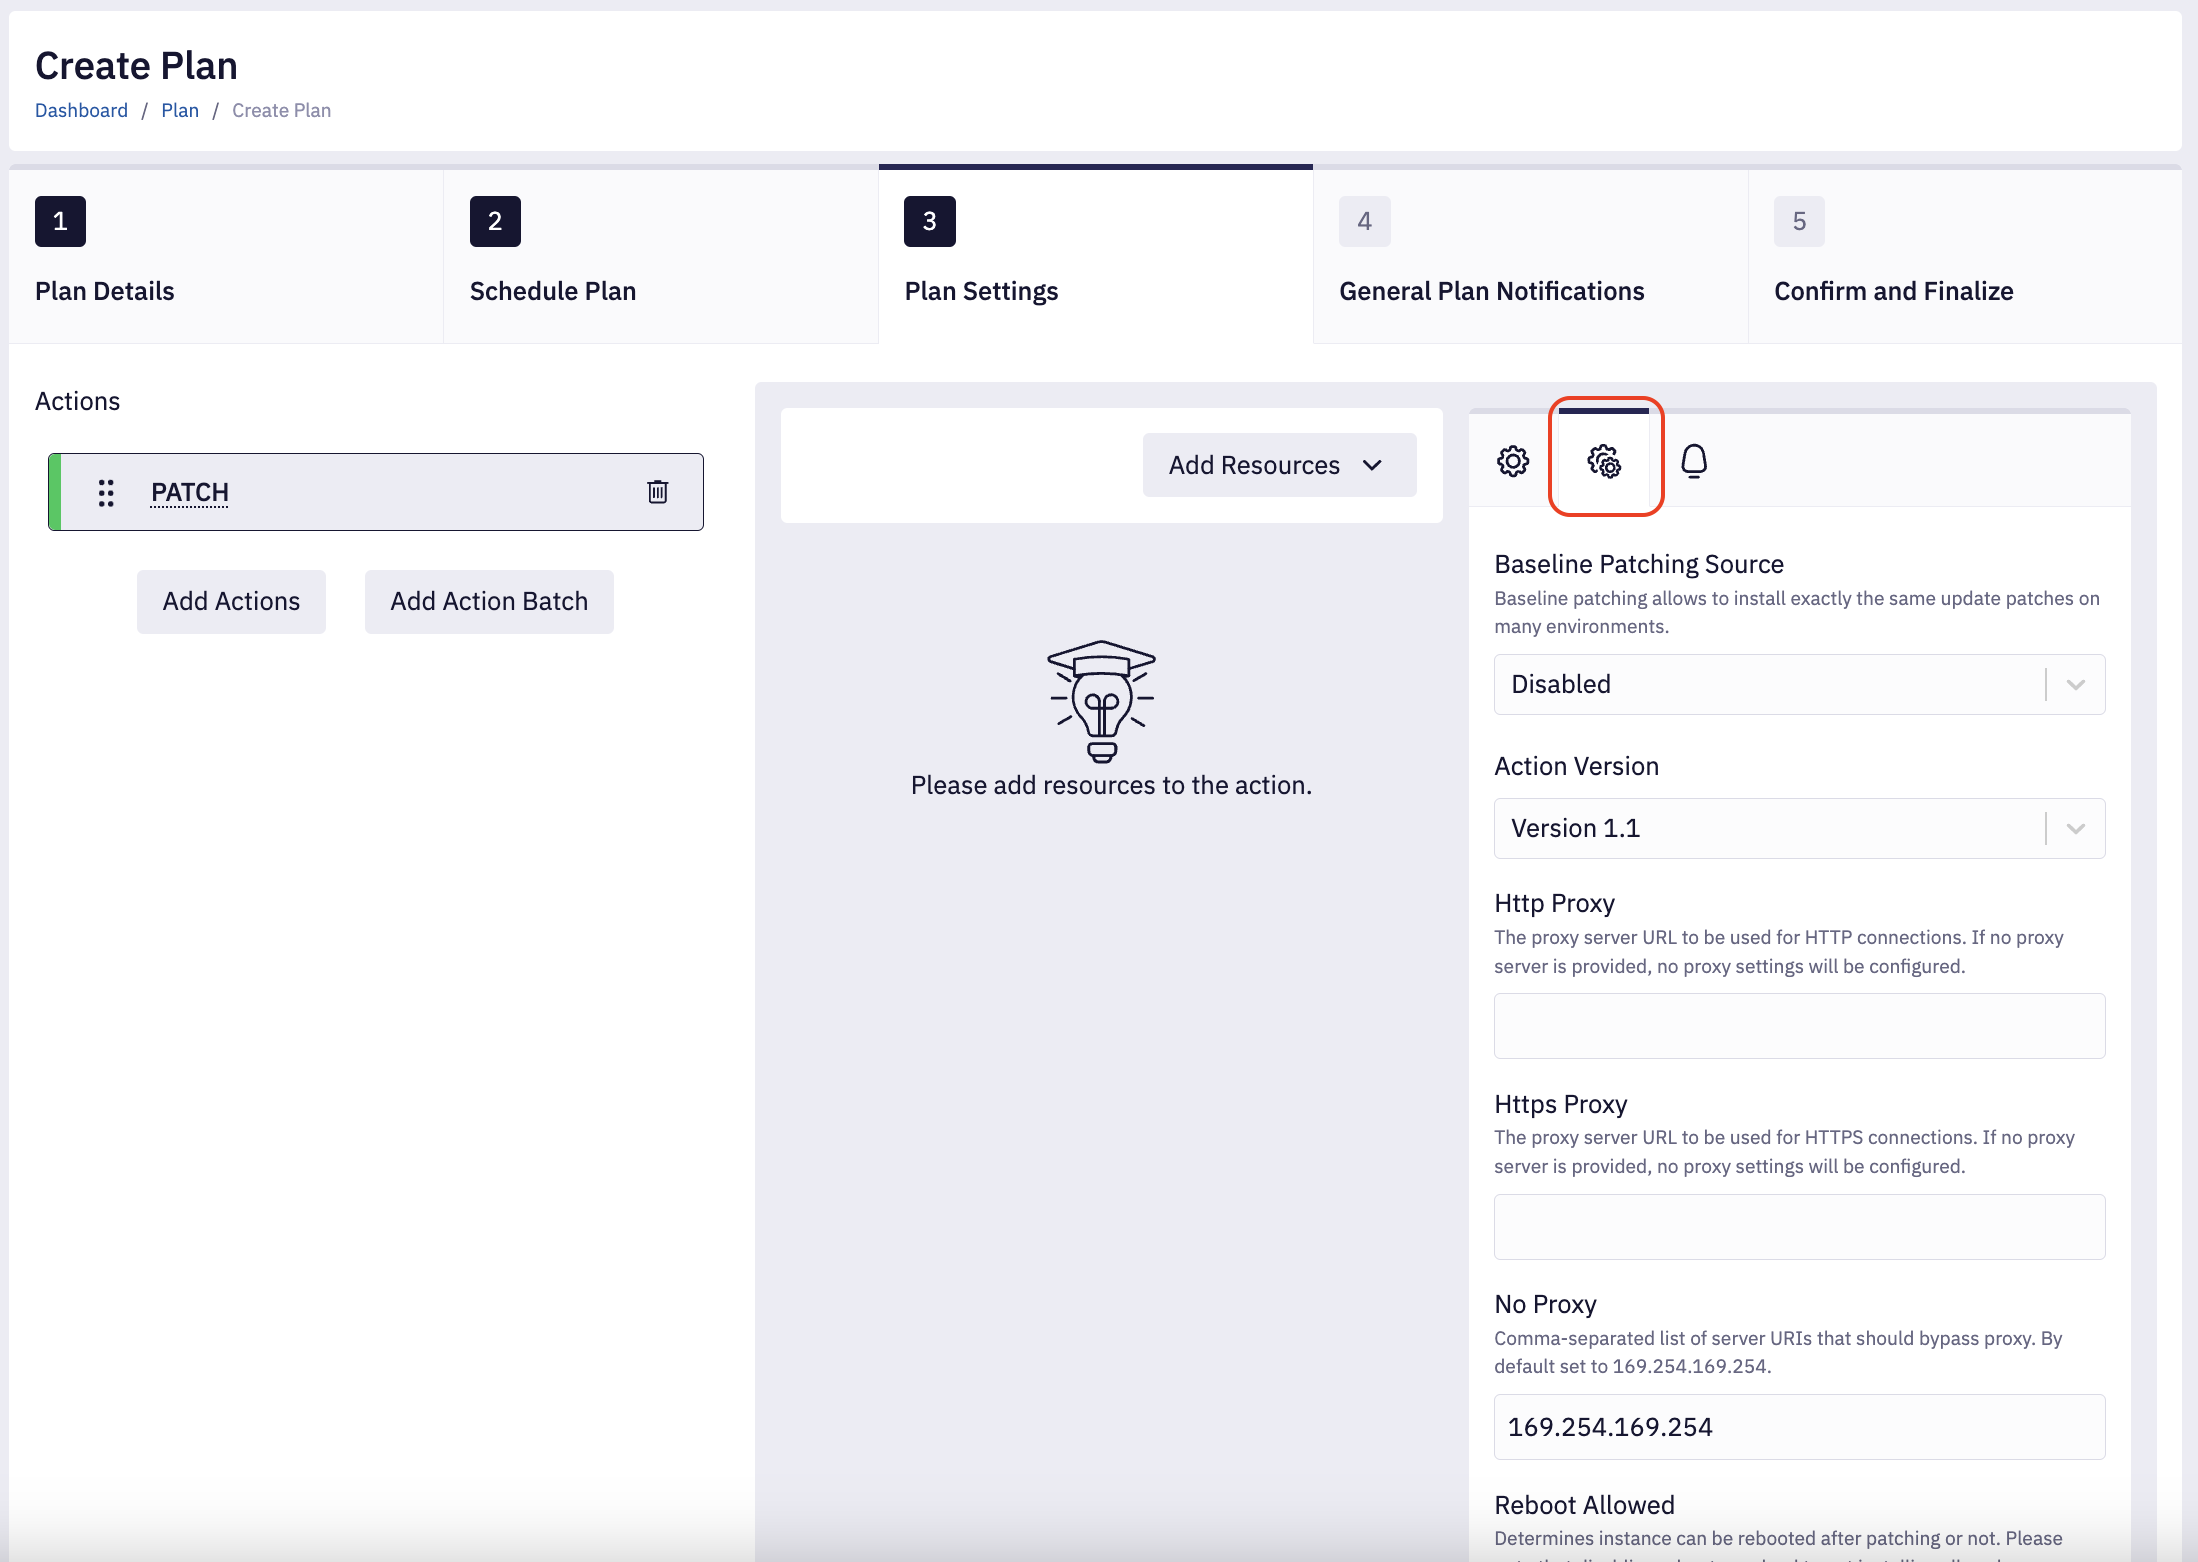
These settings are specific to selected actions; some actions won't have any advanced settings available.
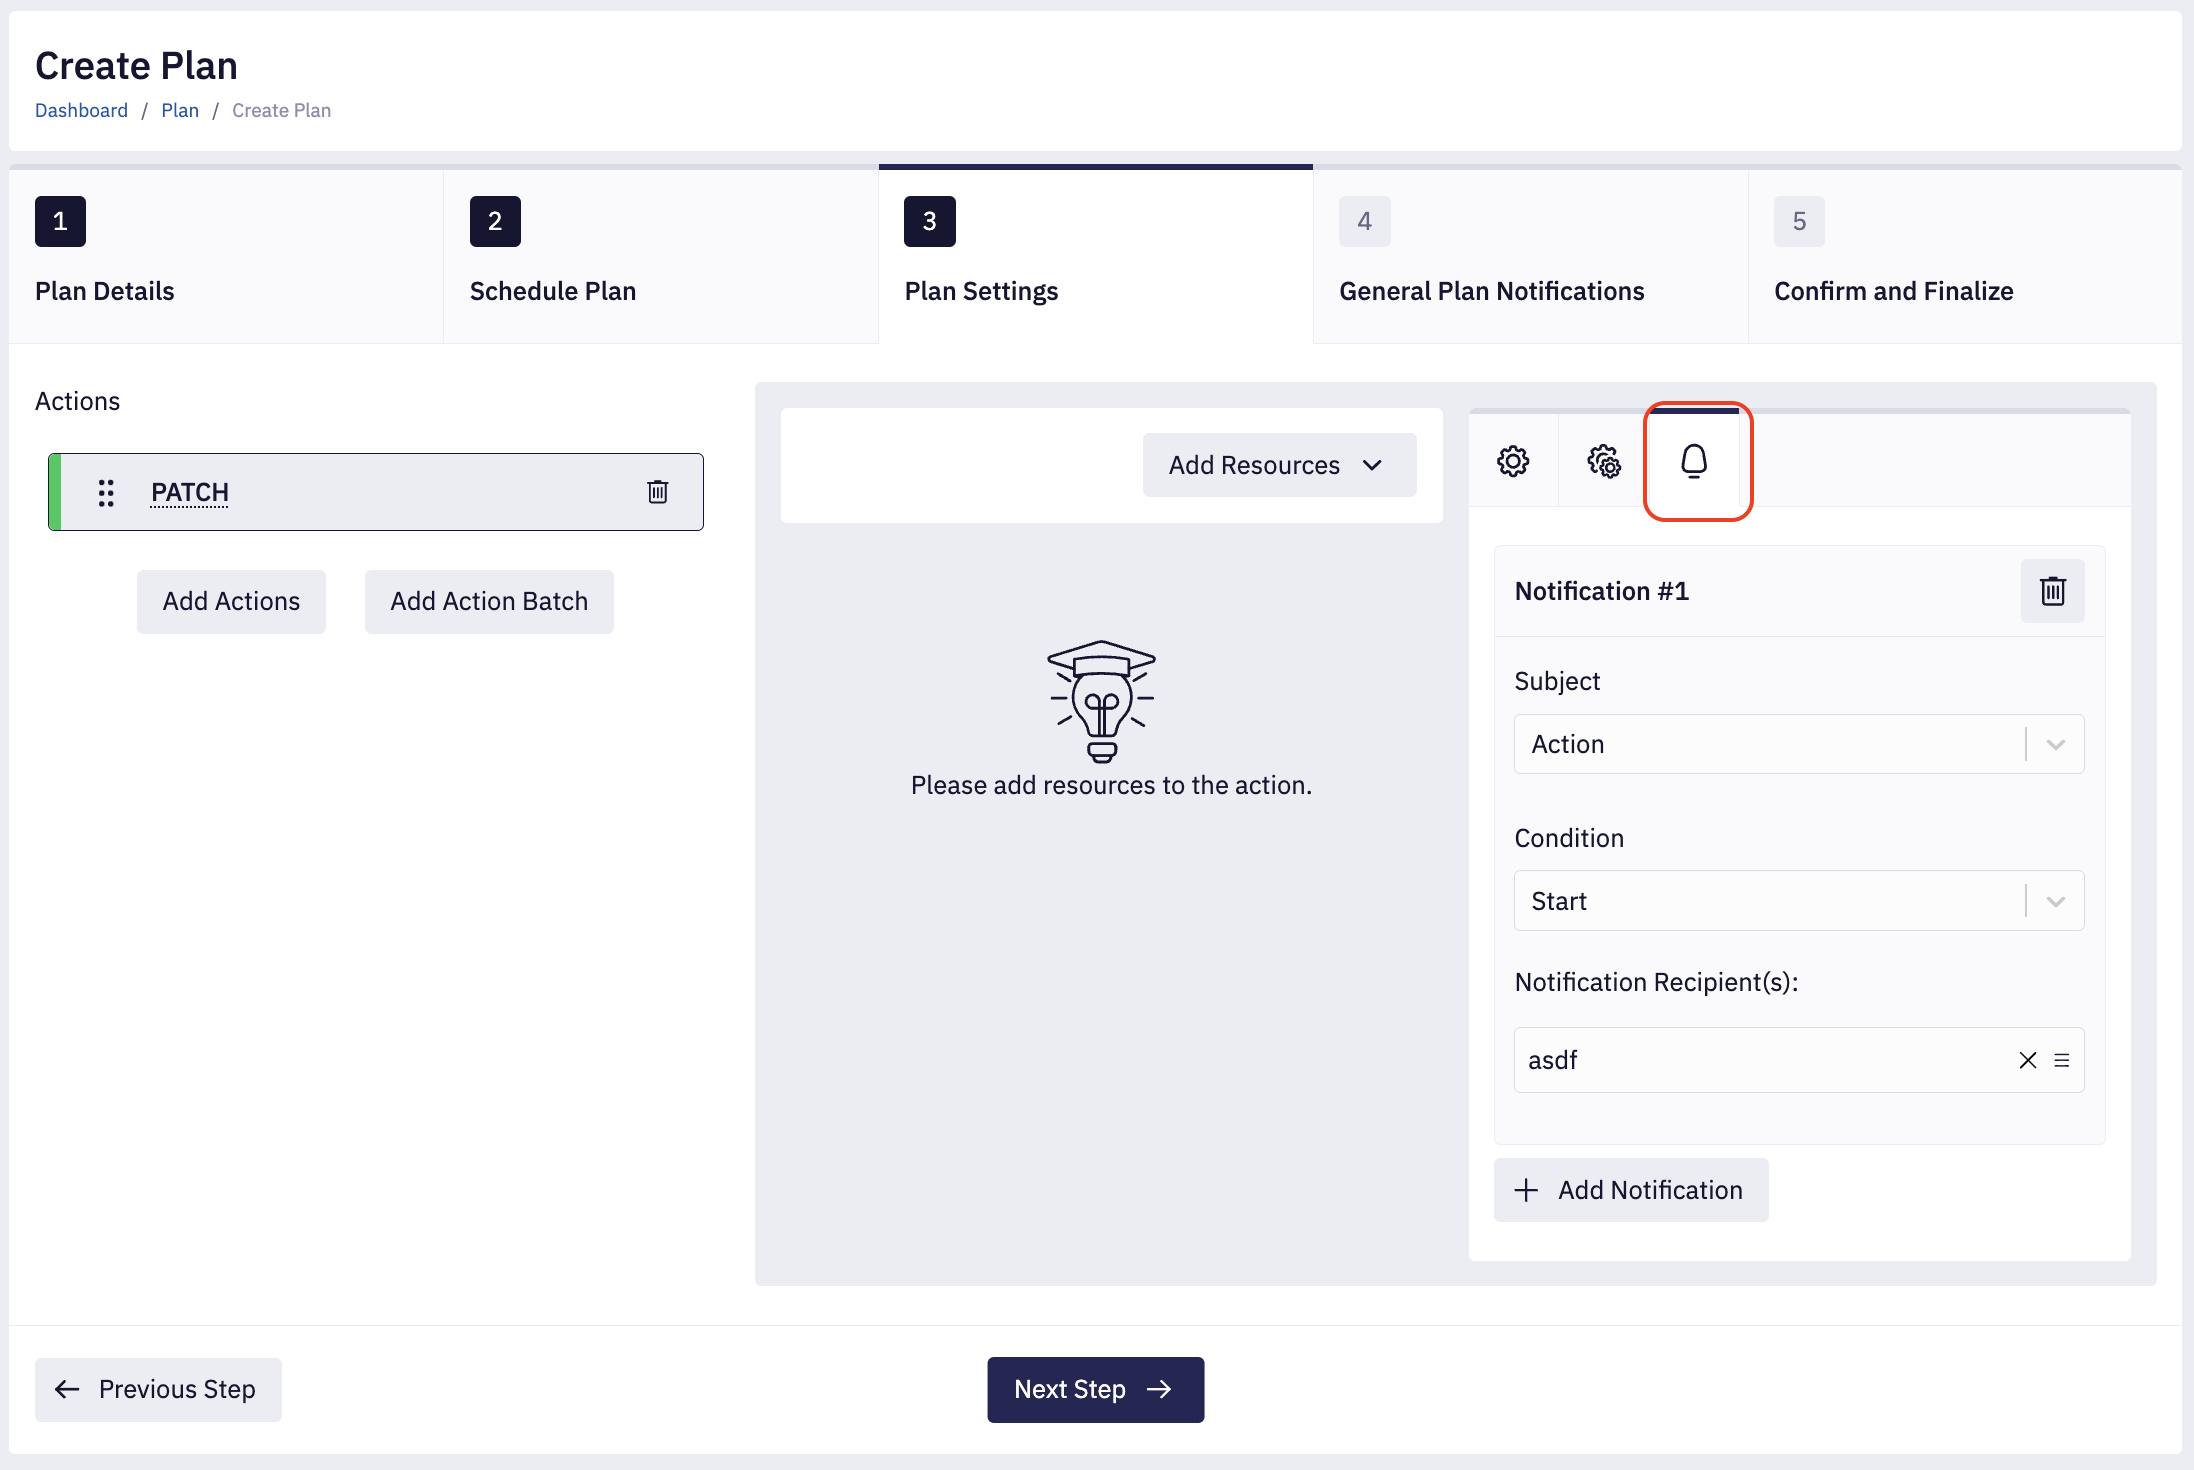
If you want to be informed about the action progress you can add notifications. Within the notification settings box, you have the option to select either Action or Resource Subject for notifications.
Depending on the notification subject, you can trigger it based on different Condition.
For Action Subject following conditions are available:
- Start - the action starts
- Successful - all executions within the action are successful
- Partially Successful - some executions within the action are not successful
- Failed - all of the executions within the action are one of: failed, error, not in time window, timeout
- Upcoming - the action is about to start - see the INFO box below for details
- Not Approved - the action is not approved - see the INFO box below for details
Additional In Advance option appears for Upcoming and Not Approved conditions.
This option determines the duration that the notification should be sent
in advance of the time the action is estimated to start.
If any of previous actions have Skip Window set to Always or On Success
the notification might not be sent at the requested time.
This is because when the time window is skipped in any of the preceding actions,
the estimated start time of every subsequent action becomes out of date.
Please be advised, that the precision of such notifications is 5 minutes, which means they can be sent out up to 5 minutes before or after the specified time.
For Resource Subject following conditions are available:
- Start - the action started on a resource
- Successful - the action completed successfully on a resource
- Failed - the action failed on a resource
- Error - the action didn't complete on a resource because of a misconfiguration or some internal problems
- Not in time window - the action did not start on a resource within the specified time window (as defined by the Window Duration)
- Timeout - the action started on a resource, but exceeded the specified window duration
Finally, you can choose the Notification Recipient(s) by selecting available notification group(s). Read more about notifications below:
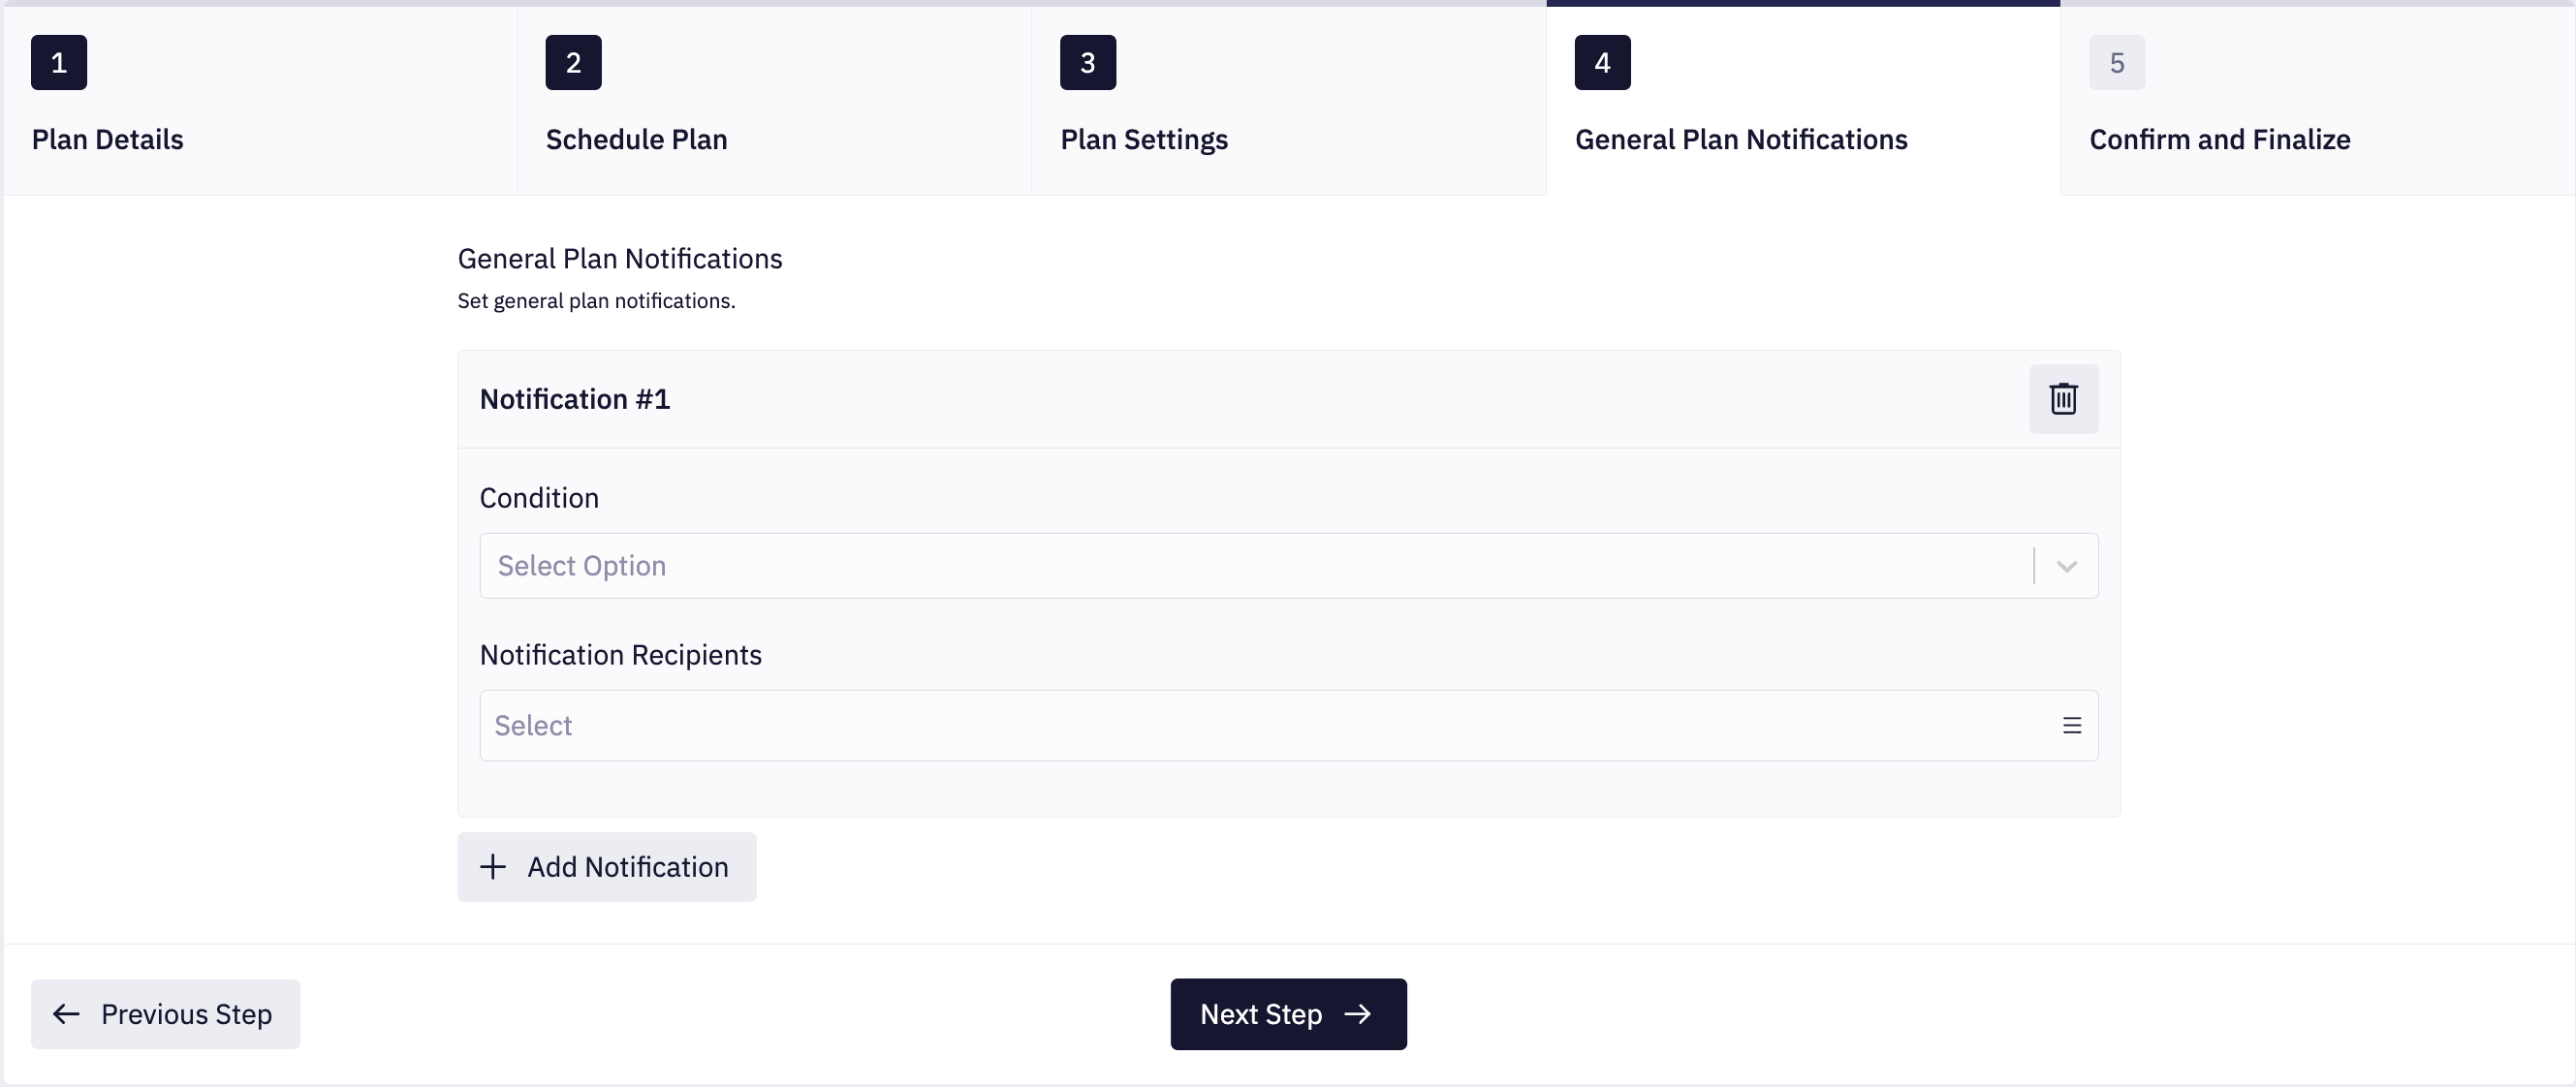
8. General Plan Notifications
If you want to be informed about the plan progress you can add notifications. In General Plan Notifications, you can choose the Condition and Recipients by selecting available notification groups.
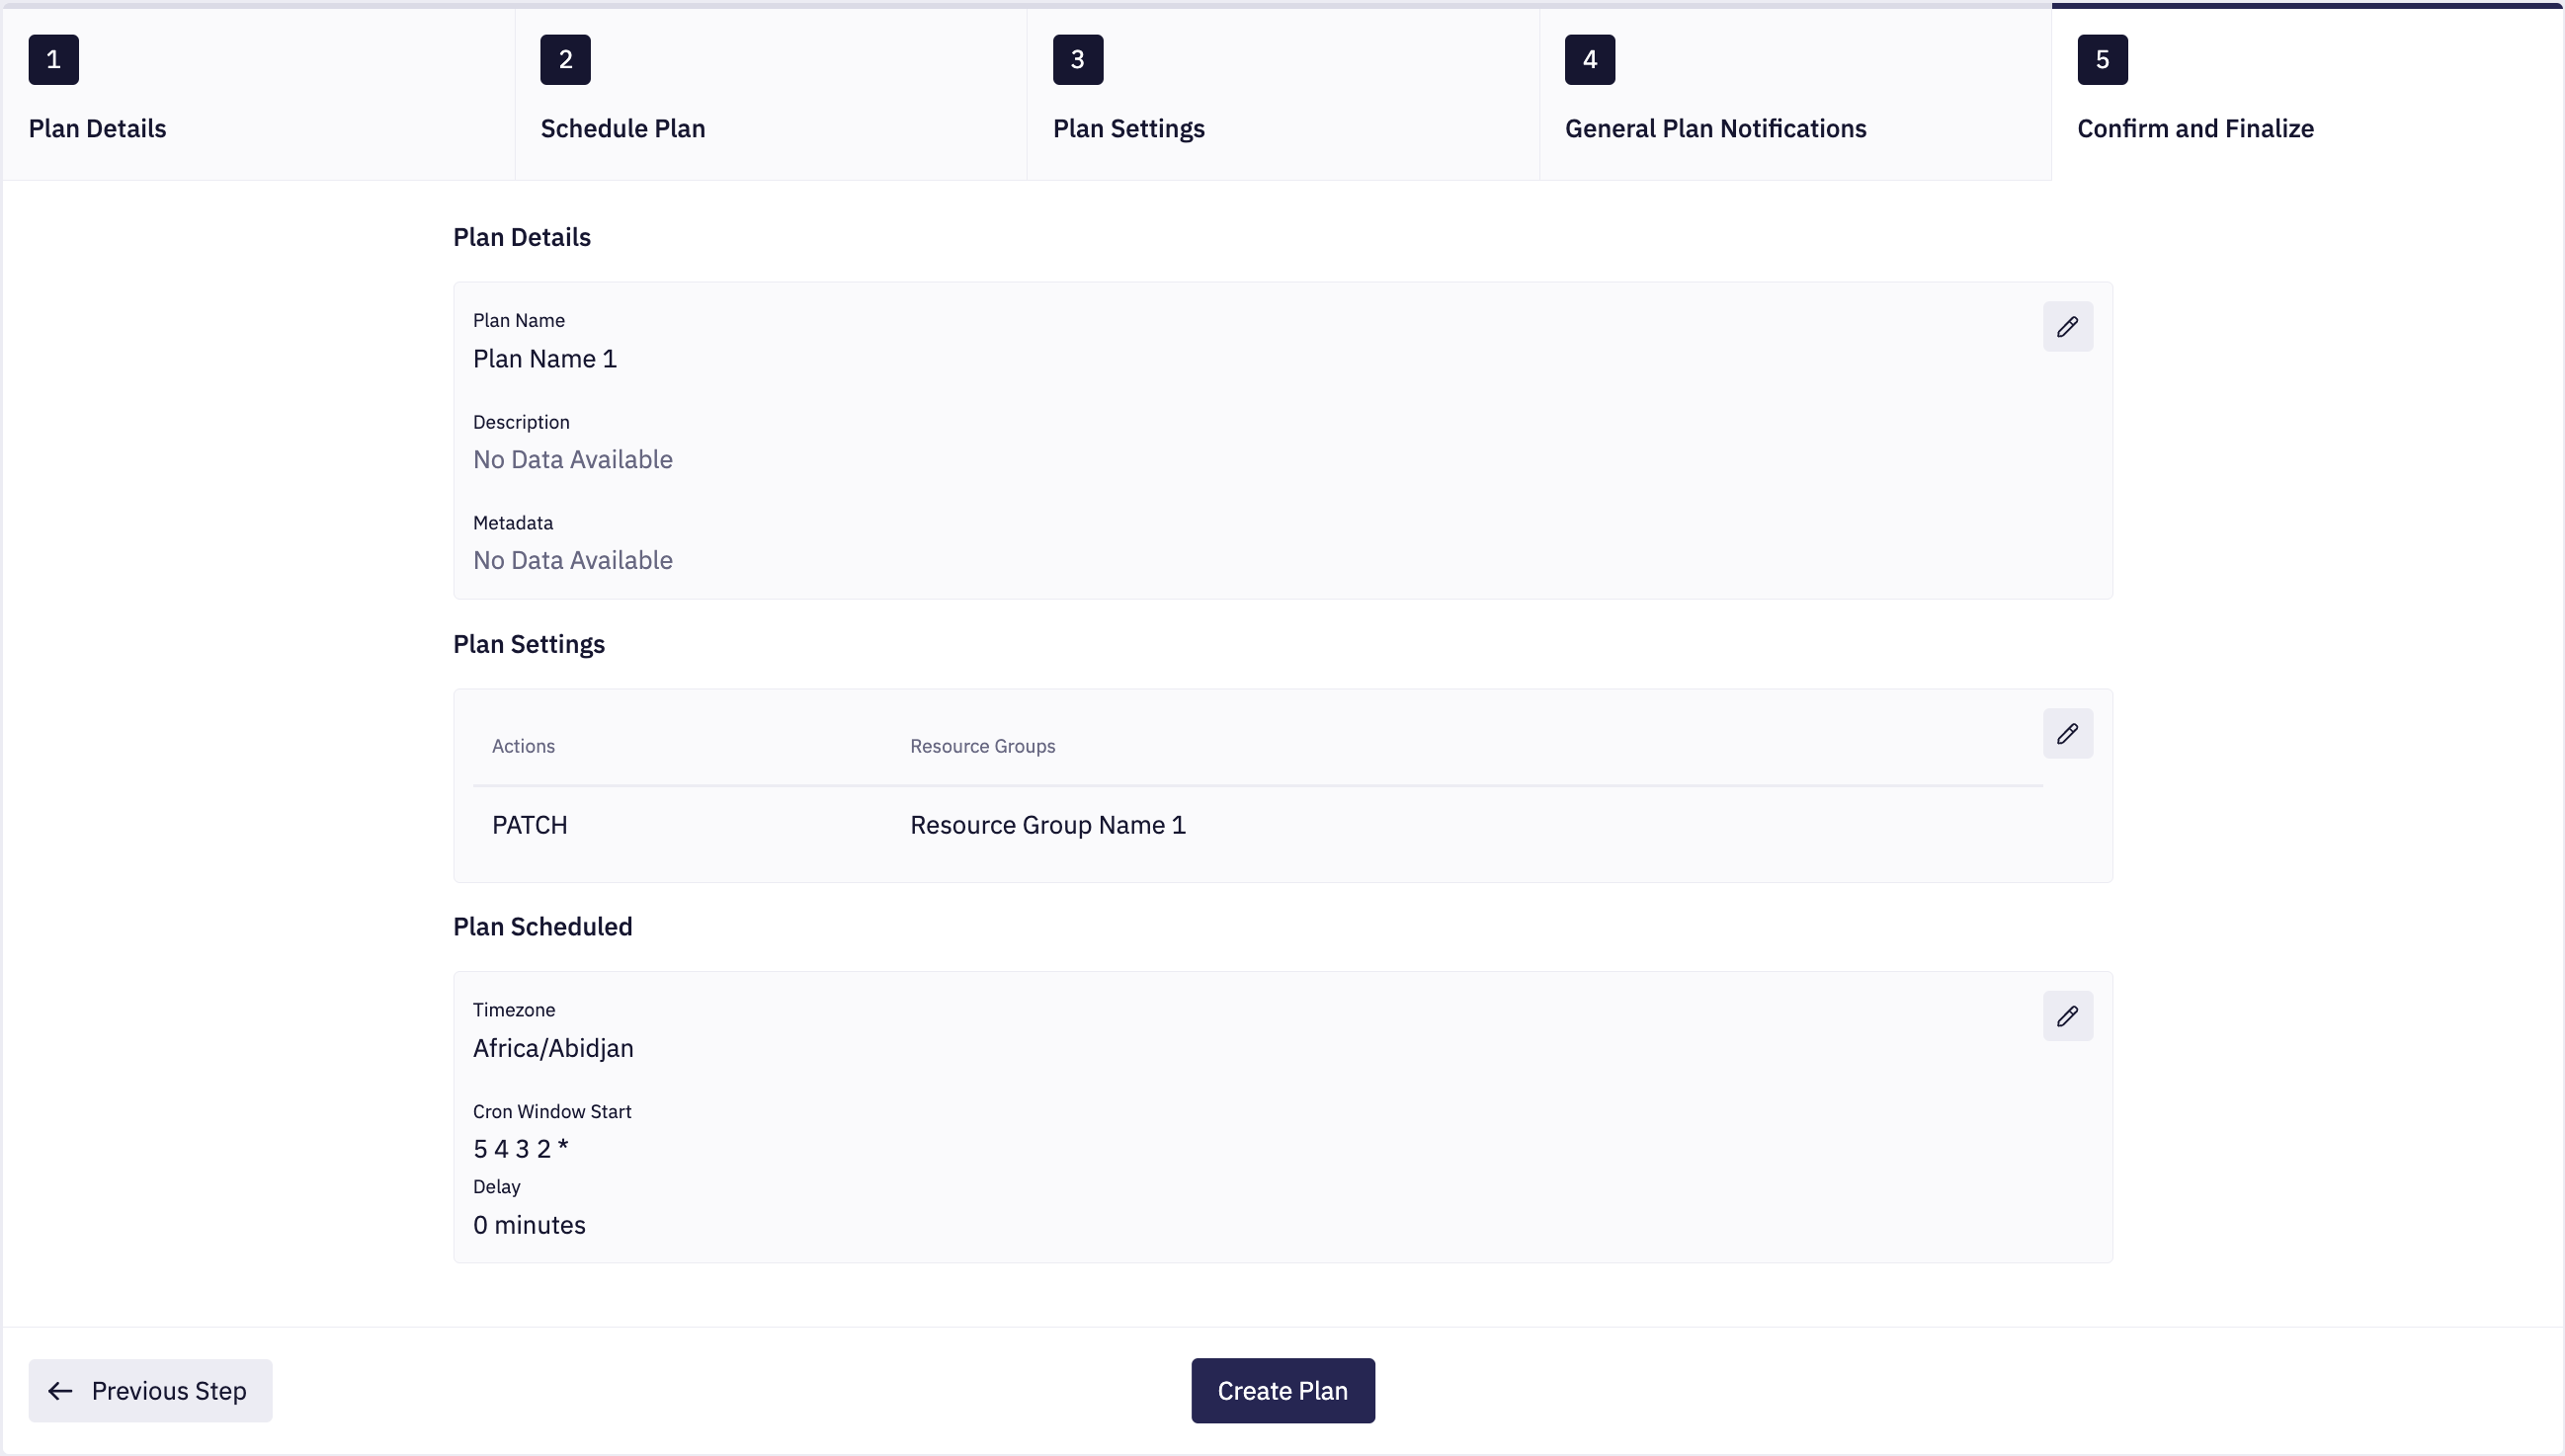
9. Confirm and Finalize
Finally, make sure that the provided data is correct, then, click Create Plan.